
Two classification systems separate surfers who catch waves from those who watch them go by. The first is breaking behavior: how the wave releases energy as it hits shallow water, which falls into four types — spilling, plunging, collapsing, and surging. The second is break type by bathymetry: what the ocean floor is made of and shaped like, which determines whether you’re surfing a beach break, reef break, point break, or rivermouth. Master both, and you gain what coaches call “break eye” — the practiced ability to spot the 5–10% of waves in any set that will actually peel well enough to ride.
By the end of this guide, you’ll be able to recognize the best wave in a set, pick the right board for the conditions, and run three short drills that convert observation into catches. Hhsurf’s lesson methodology uses this exact two-system framework to get students standing up in their first session.
Start right now with these three actions:
- Watch one full set from the beach for 3 minutes. Count how many waves arrive and note which one breaks last.
- Identify the peak — the highest point where the wave first starts to pitch. That’s your takeoff zone.
- Test a commitment paddle on one small, rolling wave: keep paddling two extra strokes after you feel the wave lift your tail.
Pro Tip: Before you paddle out anywhere new, spend at least five minutes watching from the sand. You’ll see the peak location, the channel, and the set rhythm — information you can’t get from inside the water.
Table of Contents
- The four breaking wave types you need to recognize
- How bottom type shapes every wave you’ll ever surf
- Wave anatomy and the ocean forces that change everything
- How to read sets, find the takeoff zone, and position yourself
- Matching your board and technique to the wave in front of you
- Safety rules and lineup etiquette that protect everyone
- Situational waves: the ones that surprise you
- How structured lessons accelerate your break-eye development
- How to predict wave set timing and position yourself better
- Advanced wave selection: how to find the best wave in a set
- How to choose the right line on any wave to maximize your ride
- Drills to sharpen your break eye in every session
- Key Takeaways
- The learning curve is longer than the internet suggests
- Ready to build your break eye with a coach in Waikiki?
- Useful sources for forecasting and wave-reading
The four breaking wave types you need to recognize
Breaking waves fall into four types determined primarily by the slope of the seabed and how quickly energy is released at the surface. Each type looks different, demands different timing, and rewards different technique.
Spilling waves
The crest tumbles forward gradually, producing a long white foam line that rolls down the face. The lip doesn’t throw; it crumbles. You’ll see this at gently sloping sandy beaches where the water shallows slowly. Spilling waves are the most forgiving: they give you more time to pop up, more room for positioning errors, and a longer window to match the wave’s speed. Beginner-friendly. The main risk is complacency — surfers who learn only on spilling waves often struggle badly when they encounter steeper conditions.
Plunging waves
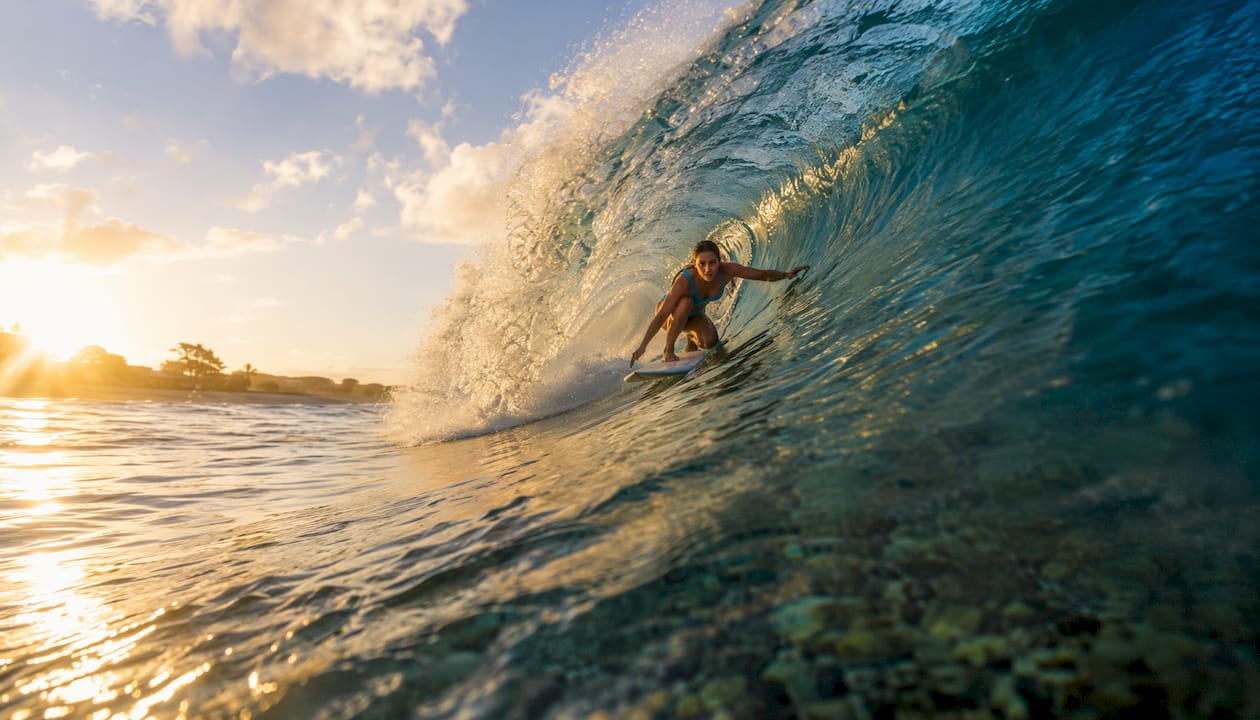
The lip pitches forward and throws over, sometimes forming a hollow barrel. This happens when a swell hits a steep or sudden depth change — a reef ledge, a sharp sandbar drop. The face goes nearly vertical fast, which compresses your takeoff window dramatically. You need to be positioned deeper (closer to the breaking point) and commit earlier. Intermediate to advanced. The most common beginner mistake on plunging waves is pearling: the nose digs in because the surfer either took off too late or stopped paddling too soon. Even a 2-foot plunging wave is significantly harder to surf than a 2-foot spilling wave — the steepness changes everything about timing.
Collapsing waves
A hybrid of surging and plunging, collapsing waves steepen on the lower portion of the face without the lip ever fully throwing over. The bottom of the wave goes vertical and collapses into whitewater, but there’s no dramatic barrel. You’ll find these on moderately steep seabeds. They’re inconsistent to read and tricky to time because the breaking point shifts. Intermediate. Treat them like a plunging wave but expect a shorter, less defined ride.
Surging waves
The wave surges up a steep beach face without ever truly breaking. There’s almost no visible whitewater because the energy dissipates through the powerful up-and-down movement against the shore. Long-period swells hitting very steep beach profiles produce these. From a surfing standpoint, surging waves offer almost nothing to ride. They’re also hazardous — the force against the shore is strong, and there’s no predictable breaking point. Sit these out if you’re learning.
Pro Tip: Before paddling for any wave, run a three-second mental check: Is the crest crumbling (spilling)? Is the lip throwing (plunging)? Is the face collapsing without a full lip (collapsing)? Is it just surging up the sand (surging)? That three-second read determines your takeoff timing and position.
How bottom type shapes every wave you’ll ever surf
The ocean floor — its material, depth, and contour — is the single biggest factor in how a wave breaks. Sand, reef, rock, and headlands each produce a distinct character of wave, with different predictability, ride length, and risk profile.
| Break type | Bottom | Predictability | Typical ride length | Peak behavior | Recommended level |
|---|---|---|---|---|---|
| Beach break | Sand | Low to moderate | Short to medium | Shifting with sandbars | Beginner to intermediate |
| Reef break | Coral/rock | High | Medium to long | Fixed, consistent | Intermediate to advanced |
| Point break | Headland/rock | High | Long to very long | Defined, one direction | Progressing to advanced |
| Rivermouth | Sand/pebble | Moderate | Medium | Can break both ways | Intermediate |
Beach breaks
Sandbars shift constantly with currents and swell, so the peak location changes from session to session and even within a single session. That variability is actually useful for learners: multiple peaks spread across the beach reduce crowd pressure, and the sandy bottom is forgiving when you wipe out. Most surf schools teach on beach breaks for exactly this reason. The downside is that you can’t memorize a fixed takeoff spot — you have to read the peak fresh every time, which is great practice for break eye. Classic U.S. beach breaks include the outer banks of North Carolina and the beach breaks along Southern California’s coast.
Reef breaks
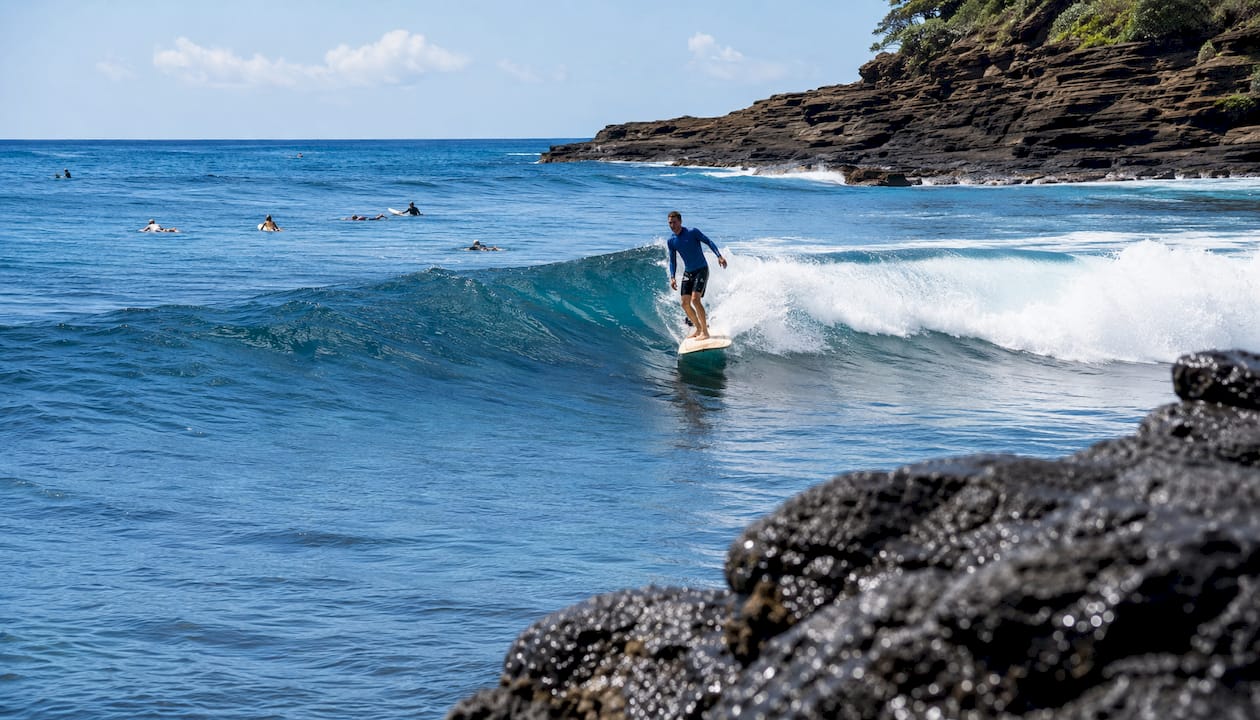
Because the bottom doesn’t move, the wave breaks in the same spot at the same angle every time a swell of similar size and direction arrives. That consistency is both the appeal and the danger. Once you understand a reef break, you can return to the exact takeoff point every session. But reef breaks are also more powerful — hard bottoms don’t absorb energy the way sand does — and a shallow reef below you raises the stakes of every wipeout. Maui’s North Shore reefs are a well-known example of the power and precision reef breaks demand.
Point breaks
A headland or rocky outcrop extending into the ocean causes the swell to wrap around it and break progressively along the feature, producing the longest rides in surfing. The wave peels in one consistent direction, which gives you time to practice bottom turns, trimming, and linking maneuvers. Rincon in California is the textbook U.S. example: a right-hand point break that on a good swell can peel for several hundred meters. The tradeoff is crowd pressure — one peak, one direction, everyone queuing for the same wave.
Rivermouth breaks
Where a river meets the ocean, sediment deposits create shifting sandbars that can produce surprisingly good peaks. Rivermouths can break both left and right off the same peak, and ride quality depends heavily on river flow, tide, and swell direction. They’re more finicky than other break types but worth learning because they train you to read rapidly changing conditions.
Simple bathymetry rule: A gradual slope produces spilling waves; a steep or sudden depth change produces plunging waves. Headlands refract swell energy and focus it into a peeling line. Sandbars concentrate energy into a peak wherever the bar is shallowest. Understanding that the bottom is the sculptor helps you predict what any new spot will do before you paddle out.
Wave anatomy and the ocean forces that change everything
Every wave has the same basic parts, and knowing what each one does changes how you read a lineup.
Peak: The highest point of the wave, where it first begins to pitch. This is where you want to be for takeoff. Face: The unbroken wall of water below the lip — your riding surface. Lip: The top edge of the wave as it begins to throw or crumble. Shoulder: The section of the wave away from the peak that hasn’t broken yet — where you ride toward to extend the wave. Trough: The lowest point between the wave and the water in front of it. Takeoff zone: The narrow area just behind or at the peak where you can catch the wave before it breaks.
Swell period: the number that matters most
Swell period is the time in seconds between successive waves. It’s the single most useful number in a forecast.
A 15-second swell carries significantly more energy per wave than a 10-second swell at the same measured height. Longer-period swells travel faster, penetrate deeper into the water column, and produce more powerful, better-shaped waves when they hit the shallows. A 15-second period often delivers cleaner, more powerful faces than a 10-second period of identical height.
In practical terms: a 3-foot swell at 8 seconds produces choppy, weak waves that close out quickly. A 3-foot swell at 15 seconds produces organized, powerful waves that peel cleanly. Always check period alongside height when reading a forecast.
Wind and tide
Offshore wind (blowing from land toward the ocean) holds the wave face up, producing cleaner, steeper waves. Onshore wind (blowing from ocean toward land) pushes the face down and creates choppy, crumbling conditions. Side-shore wind can be workable but makes reading the lip harder.
Tide changes the depth over the bottom, which changes how the wave breaks. At low tide, a sandbar or reef is shallower, producing steeper, hollower waves. At high tide, the same spot may produce slow, mushy rollers. Most beach breaks have a “sweet spot” tide window — usually mid-tide — where the sandbars produce their best shape.
Refraction and secondary peaks
When a swell hits a headland or underwater ridge, it bends around the obstacle. That bending, called refraction, can create secondary peaks away from the main break. Advanced wave-readers scan for these refractions because they often produce uncrowded, well-shaped waves that most surfers ignore. Spotting a secondary peak from a headland refraction is one of the clearest signs of developing break eye.
How to read sets, find the takeoff zone, and position yourself
Waves arrive in sets — typically three to seven waves — followed by a lull. The lull is when you paddle out. The set is when you catch waves. Knowing this rhythm is the foundation of smart positioning.
Positioning in the lineup determines your wave count more than aggressive paddling. Surfers who sit in the right spot and read the peak catch more waves with less effort than those who chase every bump.
The set-count drill
- Sit on the beach or a high vantage point and watch the ocean for five minutes before paddling out.
- Count the waves in each set as they arrive. Note the lull between sets.
- Identify which wave in the set breaks best — usually the second or third wave, as the first often closes out.
- Note where the peak forms relative to a fixed landmark on the shore (a lifeguard tower, a rock, a building).
- Use that landmark to hold your position in the water once you paddle out.
The takeoff-zone ladder
Sit slightly outside (further from shore) for steep, plunging waves — you need more time to match speed before the lip throws. Sit slightly inside (closer to shore) for rolling, spilling waves — you can catch them later in their break cycle. Shift your position as the tide changes. If you’re consistently missing waves by being too far out or too far in, move one board-length at a time until you’re catching them.
The commitment-paddle drill
The most common reason surfers miss catchable waves is stopping their paddle too early. When the wave lifts your tail, that’s the signal to paddle harder, not stop. The commitment paddle means two to three extra strokes after you feel the lift, which matches your board speed to the wave and prevents nosediving. Practice this on small, easy waves until it’s automatic.
Pro Tip: Look for refractions and secondary swells. Pros scan the horizon for cross-currents and headland refractions to find the waves that most surfers miss. If you see a bump approaching from a slightly different angle than the main swell, watch it — it may produce the best wave of the set.
- Use shore landmarks to avoid drifting out of the takeoff zone during a session.
- After each wave, paddle back to your landmark before the next set arrives.
- If the peak shifts mid-session, reassess from the beach before you reposition.
Matching your board and technique to the wave in front of you
Gear selection is part of wave mastery. The wrong board for the conditions makes every wave harder than it needs to be.
Board rules of thumb by wave type:
- Spilling waves: Longer boards with more volume and less rocker. A longboard or mid-length lets you glide into the wave early and trim along the face. More stability, more forgiveness.
- Mixed beach break conditions: A mid-length (7–8 feet) handles both rolling and moderate plunging waves without committing to either extreme.
- Plunging/steep waves: Shorter boards with more rocker so the nose clears the steep face during takeoff. Lower volume for edge control on fast, hollow sections.
- Reef bottoms: Wear booties if the reef is sharp. A thicker leash reduces the chance of snapping on a heavy wipeout. Know your exit route before you paddle out.
For board volume and length tradeoffs, the principle is simple: more volume helps on slow, rolling waves; less volume and more rocker helps on steep, fast ones.
Technique by wave type
- Spilling waves: Use a flatter, more relaxed pop-up. You have time. Focus on trimming along the shoulder rather than a fast drop.
- Plunging waves: Pop up earlier — before the lip throws. Your weight should be centered or slightly back to keep the nose up on the steep drop.
- Collapsing waves: Treat like a plunging wave but expect a shorter ride. Commit fully or pull back — half-committing leads to the worst wipeouts.
- Beach breaks with shifting peaks: Stay mobile. Be ready to paddle left or right as the peak moves.
Common mistakes and fixes:
- Pearling (nose diving): You’re either too far forward on the board or you stopped paddling too early. Move back 2–3 inches and use the commitment paddle.
- Missing waves: You’re sitting too far outside or not paddling hard enough early. Move inside one board-length and start paddling when the wave is still 10 feet away.
- Riding straight to shore: You’re not angling your takeoff. As you pop up, look down the line toward the shoulder and angle your board that direction from the start.
Pre-session checklist:
- Leash attached to back ankle, fin screws tight.
- Wax fresh for the water temperature.
- Know the tide window for the spot.
- Identify the channel for paddling out and the exit point.
Safety rules and lineup etiquette that protect everyone
The surfer closest to the peak has right-of-way. That’s the foundational rule of surf etiquette, and breaking it creates dangerous situations and earns lasting hostility from the locals.
Core etiquette rules:
- Don’t drop in. If someone is already riding a wave, don’t paddle for it from the shoulder side.
- Don’t snake. Paddling around someone to get closer to the peak and steal priority is the fastest way to make enemies in any lineup.
- Call your line. If you’re going right, say “right” loudly as you take off so others know which direction you’re heading.
- Give space on the shoulder. Don’t sit directly in front of another surfer’s likely ride path.
- Beginners should favor the shoulder and the whitewash zone, away from the main peak and the impact zone.
Safety red flags by break type
- Beach breaks: Watch for rip currents running through gaps in the sandbars. A rip looks like a darker, choppy channel of water moving away from shore. Paddle parallel to shore to escape it, not against it.
- Reef breaks: Know the depth at low tide before you paddle out. A shallow reef at low tide can be inches below the surface. Protect your head on wipeouts — cover it with your arms.
- Surging shorebreak: Don’t turn your back on the water. Surging waves can knock you off your feet with no warning.
Pre-session spot check
Before paddling out anywhere new, spend five minutes identifying: the tide window (is it rising or falling?), the channel location (where the water is moving offshore, which is your paddle-out lane), any visible currents, and your exit point if you get pushed down the beach.
When visiting Hawaiian breaks, understanding local surf culture and customs is as important as reading the waves. Respect for locals, patience in the lineup, and a humble attitude go further than any technique.
Pro Tip: If you’re unsure whether a spot is too advanced for you, watch from the beach and ask yourself: “Can I handle the worst wipeout I see from here?” If the answer is no, find a mellower spot and build up.
Situational waves: the ones that surprise you
Not every wave fits the four standard breaking types. These situational waves appear at spots you’ll surf regularly, and knowing them prevents both missed opportunities and unnecessary risk.
Reform waves: A wave that breaks, loses energy in deeper water, then re-forms and breaks again closer to shore. The second break is often smaller and slower — good for beginners practicing in the whitewash zone. Recognize them by the way the whitewater flattens out and then a new face appears.
Backwash: Water rushing back down the beach from a previous wave collides with an incoming wave, producing a chaotic, unpredictable bump. Backwash is most common on steep beaches and near seawalls. It can launch you unexpectedly or kill a wave’s shape entirely. When you see it, either time your takeoff to avoid the collision point or wait for a cleaner wave.
Double-ups: Two waves from different sets or angles merge and stack on top of each other, producing a wave twice as powerful and steep as either wave alone. Double-ups can produce spectacular barrels but also sudden, violent wipeouts. Experienced surfers seek them out; beginners should let them pass.
Standing waves and tidal bores: Standing waves form in fast-moving rivers where water flows over a submerged obstacle, creating a stationary breaking wave. Tidal bores occur in certain river estuaries where incoming tides produce a wave that travels upstream. Both are novelties worth experiencing but require a very different approach than ocean surfing — the wave doesn’t move toward you, you do.
Cross seas: Two swell systems traveling from different directions intersect, producing a chaotic, square-patterned surface. Cross seas are visually striking but difficult and potentially dangerous to surf. Sit these out unless you’re very experienced.
Storm-driven extremes and safety note: During and immediately after major storms, wave heights, currents, and debris in the water create conditions that are dangerous even for experienced surfers. Tsunami waves are not surfable and are a life-safety emergency. If official warnings are issued, leave the water and the beach immediately.
How structured lessons accelerate your break-eye development
The gap between watching waves and reading them closes fastest with guided feedback. Hhsurf’s lesson methodology structures progression in a way that builds break eye from the first session, not as an afterthought once you can stand up.
Lesson flow:
- Observation phase: Coach walks you through reading the lineup from the beach — identifying the peak, the shoulder, the channel, and the set rhythm before you enter the water.
- Guided paddling drills: In-water practice on positioning, matching wave speed, and the commitment paddle with a coach watching and correcting in real time.
- Repeated takeoffs: Multiple guided takeoffs on appropriate waves, with immediate verbal feedback on timing and positioning after each attempt.
- Video feedback (where available): Reviewing your takeoff and line choice on video accelerates pattern recognition faster than memory alone.
What to expect at different stages:
- After 1 lesson: You can identify the peak, execute a basic pop-up on a spilling wave, and understand the commitment paddle.
- After 4 lessons: You’re reading set rhythm, adjusting your position in the lineup, and catching green waves consistently.
- After 12 lessons: You’re selecting waves by type, adjusting for tide and wind, and beginning to spot secondary peaks and refractions.
Checklist for choosing a coach or lesson program:
- Small class sizes (ideally 4:1 student-to-coach ratio or better).
- Coach familiarity with the specific spot’s peaks, tides, and hazards.
- Safety briefing before every session.
- Structured progression rather than just “go surf and we’ll watch.”
Individual attention is what separates a lesson that accelerates your learning from one that just gives you access to the water. Hhsurf’s approach emphasizes both safety protocols and personalized feedback, which is why students regularly stand up in their first session.
How to predict wave set timing and position yourself better
Set timing is predictable enough to use strategically once you know what to look for. Counting sets over several minutes before paddling out gives you a working estimate of the lull interval — the time between sets when you can paddle out safely and reposition without getting caught inside.
In practice: watch the ocean for five minutes and count how many sets arrive. If three sets arrive in five minutes, you’re getting a set roughly every 90 seconds to two minutes. That’s your window. When a set ends and the lull begins, paddle hard for the outside. When you feel the next set approaching (you’ll see the horizon darken and rise), stop paddling and let the first wave pass if you’re not in position.
Swell period from the forecast gives you a theoretical wave interval — a 15-second period means waves are arriving roughly every 15 seconds within a set. But sets themselves are grouped by ocean dynamics that aren’t perfectly regular. The practical skill is watching, not calculating. Use shore landmarks to hold your position during the lull so you don’t drift and miss the next set’s peak.
One useful habit: after catching a wave, turn around immediately and paddle back toward your landmark before the next set arrives. Surfers who celebrate a good ride by drifting toward shore consistently miss the follow-up wave.
Advanced wave selection: how to find the best wave in a set
The difference between an intermediate surfer and a pro often comes down to one skill: identifying which wave in a set will peel well and committing to it early. Most surfers paddle for the first wave that looks rideable. Experienced surfers let one or two waves go and wait for the one that’s going to peel the longest.
Here’s how to develop that instinct:
Watch the horizon, not the wave in front of you. The best wave in a set is visible on the horizon before it reaches the lineup. It will appear slightly darker, slightly taller, and will often have a different angle than the waves before it.
Look for the peak that feathers first. As a wave approaches, the section that will break first shows a slight feathering or spray at the top of the crest. That feathering tells you where the peak is and which direction the wave will peel.
Count from the back of the set. In many sets, the last wave is the largest and best-shaped. Experienced surfers let the first two or three waves go and position for the final wave of the set.
Read the angle. A wave approaching at a slight angle to the beach will peel in the direction it’s angled. A wave approaching perfectly parallel to the beach tends to close out. Slight angle equals longer ride.
Scan for refractions. Advanced wave-readers watch for secondary swells and headland refractions that produce hidden peaks away from the main crowd. Often only one or two waves out of twenty are truly ideal — finding them is the whole game.
How to choose the right line on any wave to maximize your ride
Your line — the path you take across the wave face — determines how long you ride, how much speed you generate, and what maneuvers become possible. Choosing the right line starts at takeoff.
On spilling waves: Angle your takeoff toward the open shoulder from the moment you pop up. The wave is slow enough that you can trim along the face and generate speed by pumping up and down the wave. Stay high on the face (near the lip) to maintain speed; dropping to the trough kills momentum on slow waves.
On plunging waves: Your line is more vertical at takeoff — you’re dropping down the steep face first, then angling toward the shoulder at the bottom. The bottom turn is where you redirect your speed. A strong bottom turn sets up everything that follows: a cutback, a snap, or a barrel entry. Rushing the bottom turn produces a flat, directionless ride.
On point breaks: The wave peels in one direction for a long time, so your line is a sustained diagonal across the face. The goal is to stay just ahead of the breaking section — not so far ahead that you lose the wave’s energy, not so close that the lip catches you. Pump to generate speed when the face flattens, then trim when the section steepens.
On beach breaks with shifting peaks: Be ready to change your line mid-ride. A section that looks like it will peel may close out; a section that looked closed may open up. Keep your weight centered and your eyes looking down the line, not at your feet.
For intermediate technique development — bottom turns, cutbacks, and reading sections — structured practice on the right wave type is what builds these skills fastest. Practicing bottom turns on a spilling wave is easier than on a plunging wave, but the skill transfers once you’ve built the muscle memory.
Drills to sharpen your break eye in every session
Break eye is a skill, not a talent. It improves through structured repetition, and the following drills are designed to build it session by session.
The two-minute shore observation drill: Before every session, stand on the beach for two minutes and answer three questions out loud or in your head: Where is the peak? Which direction is the wave peeling? Which wave in the last set was the best? Do this every session without exception. Over weeks, your pattern recognition becomes automatic.
The landmark anchor drill: Pick two fixed landmarks on the shore that bracket your takeoff zone. After every wave, paddle back until both landmarks are in the right position relative to you. This trains you to hold position dynamically rather than drifting with the current.
The “let one go” drill: In every session, deliberately let the first wave of each set pass without paddling for it. Watch where it peaks, how it peels, and whether it closes out. Then use that information to position for the next wave in the set. This feels counterintuitive but rapidly improves your wave selection.
The commitment-paddle repetition: On every wave you paddle for — even the ones you don’t catch — complete the full commitment paddle sequence: start paddling early, accelerate as the wave lifts your tail, and add two extra strokes after you feel the lift. Never stop early. Repeat until it’s reflex.
The surf fitness connection: Paddling endurance directly affects how many waves you can attempt in a session. Stronger paddlers can reposition faster, catch more waves, and run more drills per session. Cross-training with swimming and paddle-specific exercises compounds your in-water practice.
The post-session review: After every session, write down three things: the best wave you caught and why it was good, one wave you missed and what you’d do differently, and one positioning adjustment you made during the session. This reflection habit accelerates learning faster than simply surfing more.
Key Takeaways
Reading both breaking behavior and bottom type together is the fastest path to catching more waves and surfing with intention rather than luck.
| Point | Details |
|---|---|
| Two systems, one framework | Classify every wave by breaking type (spilling, plunging, collapsing, surging) AND bottom type (beach, reef, point, rivermouth) before paddling out. |
| Swell period over height | Longer period swells produce more powerful, cleaner waves than shorter period swells at the same height — always check period in your forecast. |
| Positioning beats paddling | Shore landmarks and set-count drills put you in the takeoff zone consistently; aggressive paddling from the wrong spot catches nothing. |
| Commitment paddle is non-negotiable | Add two extra strokes after the wave lifts your tail — stopping early is the primary cause of pearling and missed waves. |
| Hhsurf lessons build break eye fast | Hhsurf’s structured lesson flow (observation, guided takeoffs, real-time feedback) gets students standing in their first session and reading sets within four lessons. |
The learning curve is longer than the internet suggests
Here’s what most surf guides won’t tell you: break eye takes months to develop, not sessions. The articles that promise you’ll be reading lineups like a pro after one lesson are selling something. The reality is more interesting and more rewarding than that.
The surfers who plateau are almost always the ones who skip the observation phase. They paddle out immediately, chase every wave, and wonder why their catch rate doesn’t improve. The surfers who progress steadily are the ones who spend two minutes on the beach before every session, who let waves go deliberately to study them, and who practice the same three drills until the movements are automatic.
What actually separates consistent progress from plateauing isn’t talent or fitness. It’s the willingness to be a student of the ocean rather than just a participant in it. Position, timing, and the commitment paddle are fundamentals that never stop mattering — even at the professional level. Small, consistent observation habits compound. A surfer who runs the two-minute shore drill every session for 30 days develops pattern recognition that another surfer might take two years to build through unstructured practice.
The ocean is endlessly variable, which means break eye is never fully finished. That’s the part worth embracing.
Ready to build your break eye with a coach in Waikiki?
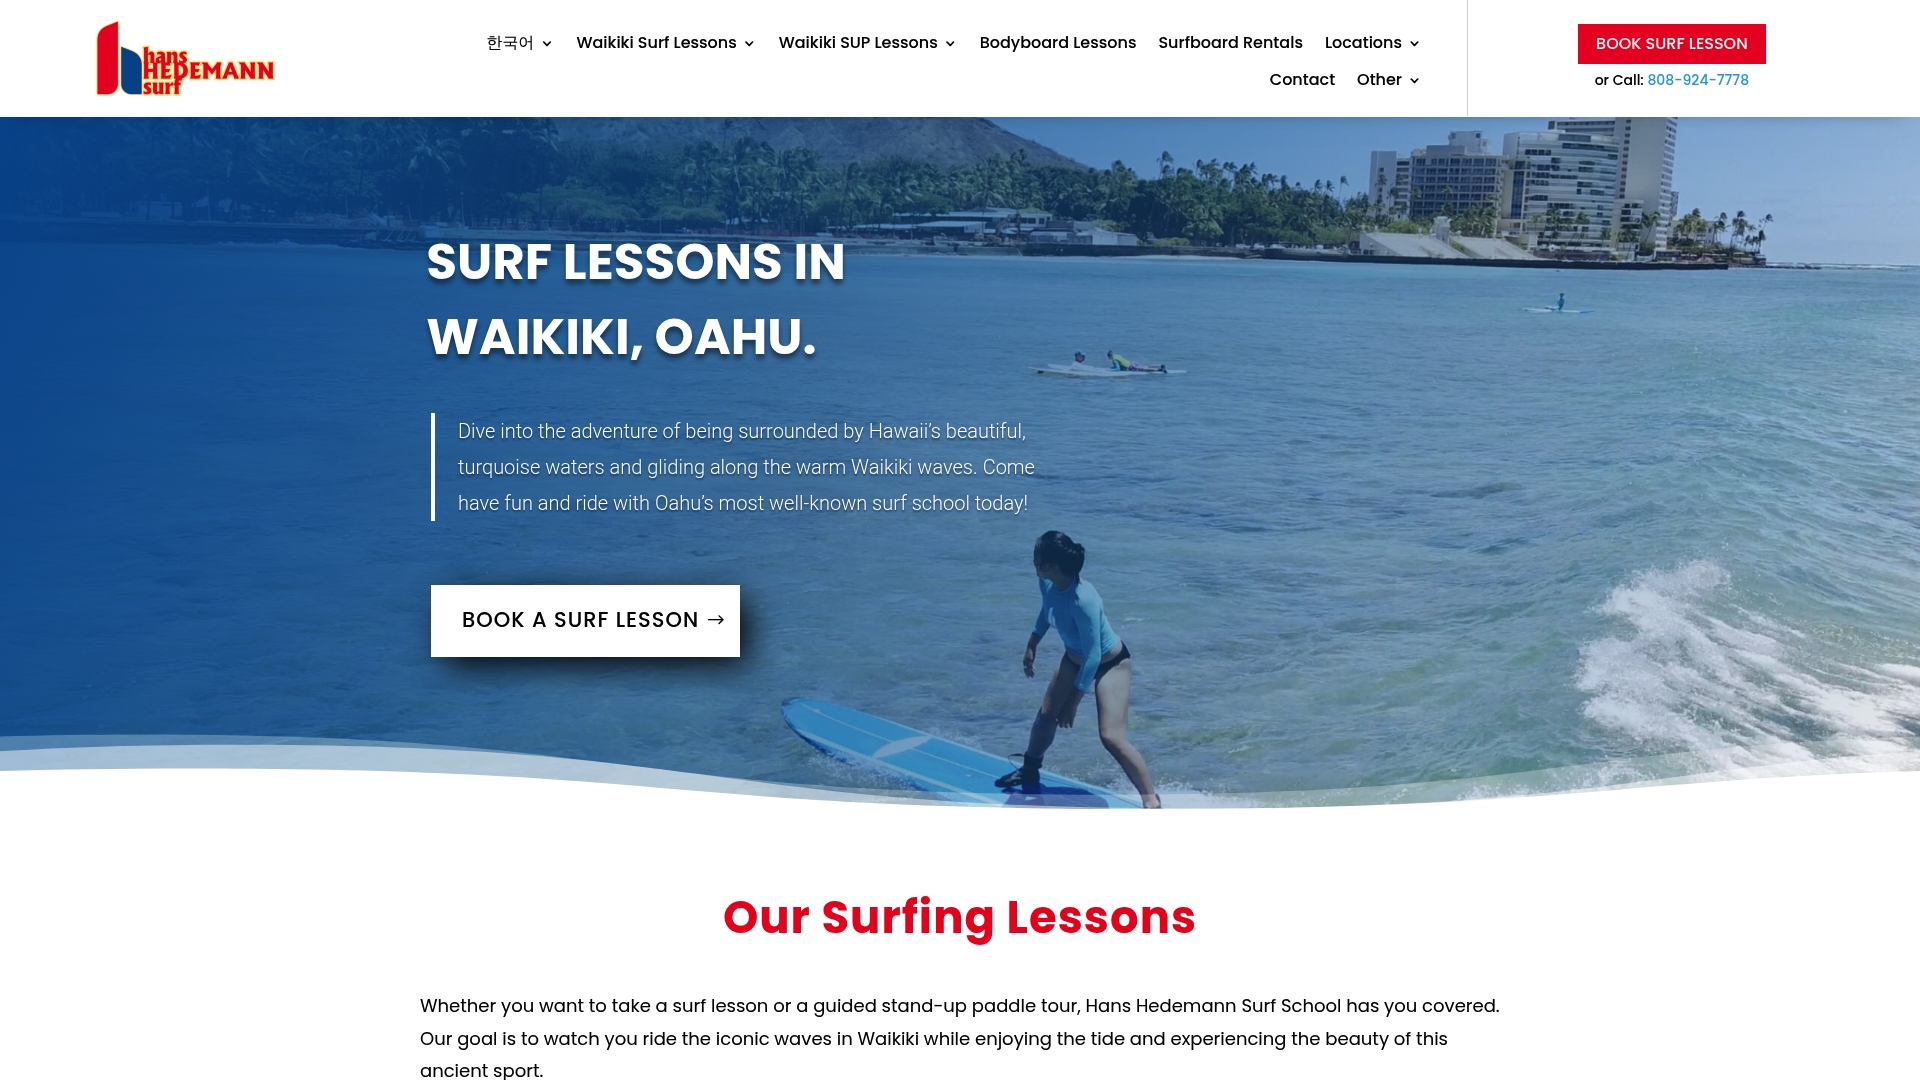
Reading about wave types gets you started. Surfing them with a coach watching your positioning and timing in real time gets you there faster. Hhsurf’s surf lessons in Waikiki are built around exactly the framework in this guide: observation drills before you paddle out, guided takeoffs on appropriate waves, and immediate feedback after each attempt.
What to expect in your first lesson:
- Safety briefing and gear selection matched to your size and the day’s conditions.
- Shore observation drill with your coach pointing out the peak, shoulder, and channel.
- Three or more guided takeoffs on spilling waves with real-time coaching.
- Feedback on your commitment paddle and pop-up timing before you leave the water.
Both private lessons and group options are available, depending on how fast you want to progress. Private sessions give you one-on-one coaching through every wave; group lessons are a great way to learn alongside others at a similar level. Book your session at Hhsurf and start catching waves on your first day in the water.
Useful sources for forecasting and wave-reading
Good wave-reading starts on your phone before you reach the beach. These sources give you the data and context to plan smarter sessions.
- NOAA (National Oceanic and Atmospheric Administration): The primary source for swell height, period, and direction forecasts for U.S. coastlines. Use it to check period (aim for 12 seconds or higher for quality waves) and swell direction before choosing a spot.
- Surfline: Detailed surf forecasts with spot-specific cameras, set height estimates, and tide windows. Use the period data alongside the height forecast — a 3-foot swell at 15 seconds is a very different session than 3 feet at 8 seconds.
- SurferToday: Clear reference on the four breaking wave types with visual descriptions — useful for cross-referencing what you observe in the water with the canonical definitions.
- Hhsurf How to Surf: Hhsurf’s lesson methodology page covers the structured progression from observation to green-wave riding — a practical companion to the drills in this guide.
- Local surf shops and lifeguard stations: For spot-specific knowledge — sandbar locations, rip current patterns, and tide windows — nothing replaces talking to someone who surfs the spot daily. Ask before you paddle out.
Combine forecast numbers with on-site observation using the drills in this guide: check the period and swell direction at home, then spend two minutes on the beach confirming what you see matches what the forecast predicted. When they don’t match, trust your eyes.
0 Comments