
A noseride means riding the front section of a longboard, specifically the front portion of the board, while the wave’s energy keeps the tail engaged and the board trimming across the face. The two most recognizable versions are the hang five (one foot dangling toes over the nose) and the hang ten (both feet planted at the tip). Both are performed on longboards, not shortboards, and both require the wave to do as much work as the surfer.
Table of Contents
- What does nose riding in surfing actually mean?
- What wave conditions make a noseride possible?
- What board setup do you need to noseride?
- How to noseride: a step-by-step technique breakdown
- Why does noseriding work? The physics behind it
- Common noseriding mistakes and how to fix them
- How to build toward your first noseride: a progression plan
- Pro surfers worth studying for noseriding style
- How a surf lesson accelerates your noseriding progress
- Safety and etiquette while practicing noserides
- Key Takeaways
- Why noseriding is worth the patience it demands
- Book a noseride-focused lesson at Hhsurf
- Useful sources
What does nose riding in surfing actually mean?
Noseriding is one of the most accomplished maneuvers in surfing, and also one of the most misunderstood. The term covers any moment when a surfer positions themselves toward the front portion of a longboard while the board continues to plane across the wave face without pearling (nose-diving). The nose itself is roughly the front part of the board, and “tip time” is the slang for how long you hold that position.
The main variants differ by foot placement and difficulty:
- Hang five: One foot at the nose with toes curled over the edge; the back foot stays further back to maintain tail pressure. This is the entry-level version.
- Hang ten: Both feet at the nose, all ten toes over the edge. Requires precise wave positioning and a well-shaped board.
- Hang heels: Heels over the nose edge instead of toes. Less common, more stylistic.
- Stretch-five: One arm extended forward while hanging five, adding a postural counterbalance.
- Tip time: A general term for any sustained period spent at the nose, regardless of exact foot placement.
Visually, you can spot a noseride by watching where the surfer stands relative to the board’s midpoint, how the tail stays submerged and engaged in the wave’s pocket, and whether the board is trimming (moving laterally across the face) rather than dropping straight down the wave. When the tail lifts or the board goes vertical, the noseride is over.
What wave conditions make a noseride possible?
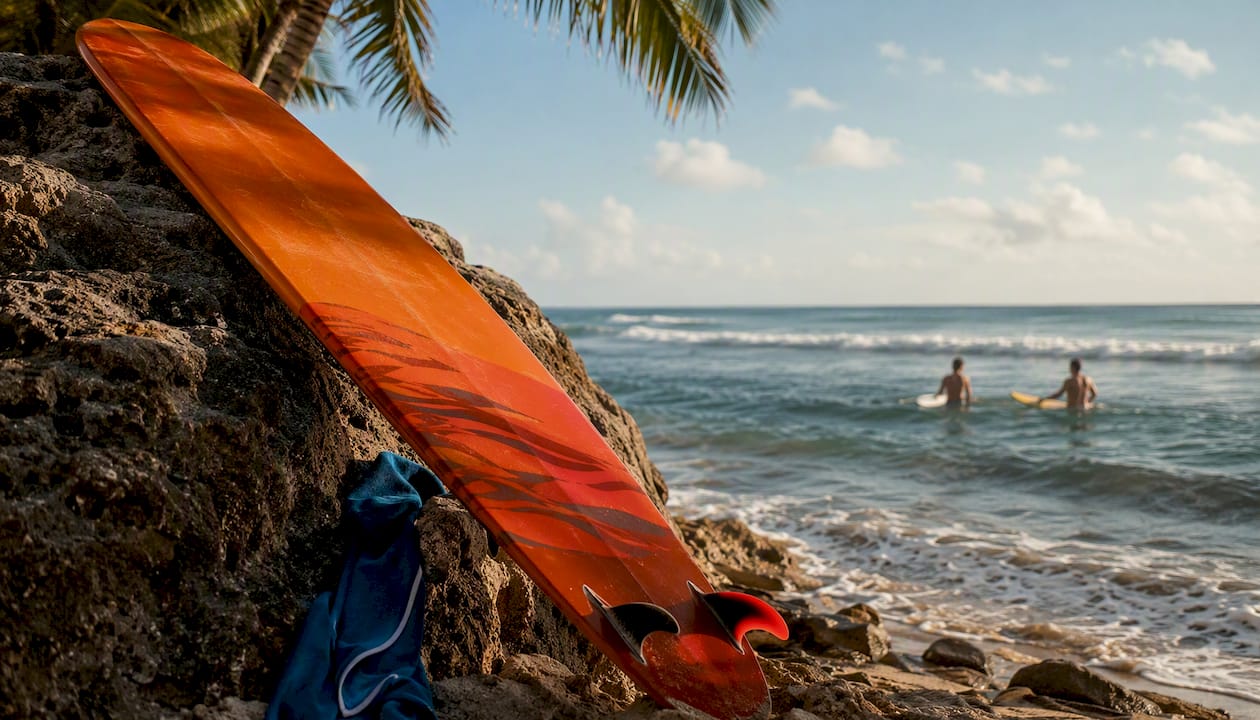
Wave selection is where most beginners lose the battle before they even cross-step. The ideal noseride wave is waist-to-head-high, with a long, peeling wall that gives you time to set up, lock in, and walk forward. Point breaks are the gold standard because the wave wraps around a headland and peels predictably for several seconds. Long, mellow beach breaks with a defined shoulder work too.
What you need the wave to give you:
- A clean, unbroken face with a visible wall ahead of you
- A defined pocket (the steepest section just below the crest) where you can stall and lock in
- Enough speed in the wave to keep the board planing without you paddling
- A wave that peels rather than closes out all at once
Conditions to avoid when learning:
- Hollow, fast-breaking beach breaks where the lip throws quickly
- Shallow reef breaks (safety risk and the wave moves too fast)
- Onshore wind chop that disrupts the board’s trim
- Waves over head-high, where the power overwhelms your ability to control position
Effective noseriding is best performed on waves of head-high or less, and that ceiling exists for a reason: bigger waves generate more force, which makes tail engagement harder to control and nose dives more punishing.
Pro Tip: Before you cross-step, look down the line. If you can see a clean wall stretching ahead of you, the wave is giving you permission to walk forward. If the wall is already crumbling, wait for the next one. As three-time WSL longboard champion Soleil Errico puts it, surf what is in front of you, not what you want the wave to do.
What board setup do you need to noseride?
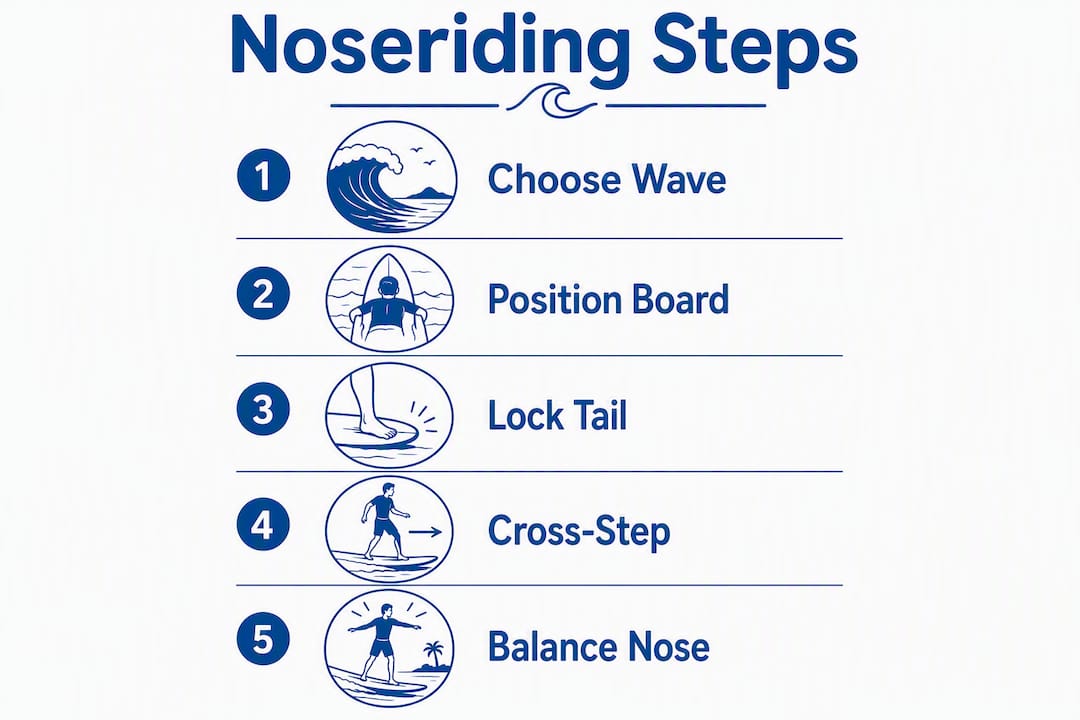
Equipment is not everything, but the wrong board makes noseriding nearly impossible. A shortboard or a fish will not work. You need a longboard built with specific design features that allow the wave to create lift under the nose.
Key specs to look for:
- Length: 9 feet (275 cm) or longer. More length means more surface area, more displacement, and more stability underfoot.
- Nose rocker: Low to moderate. Too much rocker and the nose lifts away from the wave; too little and it catches.
- Tail rocker: Moderate. The tail needs to engage the wave’s face without dragging.
- Volume and rails: Higher volume and softer, rounded rails help the wave wrap under the board and create lift. Beginners benefit from extra volume because it forgives weight shifts.
- Fin setup: A single pivot fin (taller, more upright) is the classic choice for noseriding. It allows the tail to hold in the pocket while the nose floats forward. Modern alternatives include 2+1 setups, but a single fin with good volume remains the most forgiving for learning.
| Feature | Recommended Range | Why It Matters |
|---|---|---|
| Length | 9 feet or longer | Surface area and stability for cross-stepping |
| Width | — | Lateral stability underfoot |
| Nose rocker | Low to moderate | Keeps nose close to wave face for lift |
| Fin type | Single pivot or 2+1 | Tail hold in the pocket |
| Wave suitability | Waist to head-high | Matches power to board’s planing ability |
When renting a board for a lesson, ask specifically for a noserider-style longboard, not just “a longboard.” There is a difference. A high-performance longboard built for turns will not give you the same tip time as a board shaped for noseriding. If you are booking through Hhsurf, the instructors will match you to the right board for what you are trying to learn. You can also browse board shapes and their purposes to understand why certain designs evolved the way they did.
How to noseride: a step-by-step technique breakdown
The sequence below assumes you can already stand up on a longboard and ride a wave to the shoulder. If you are still working on that foundation, build it first before attempting cross-steps.
-
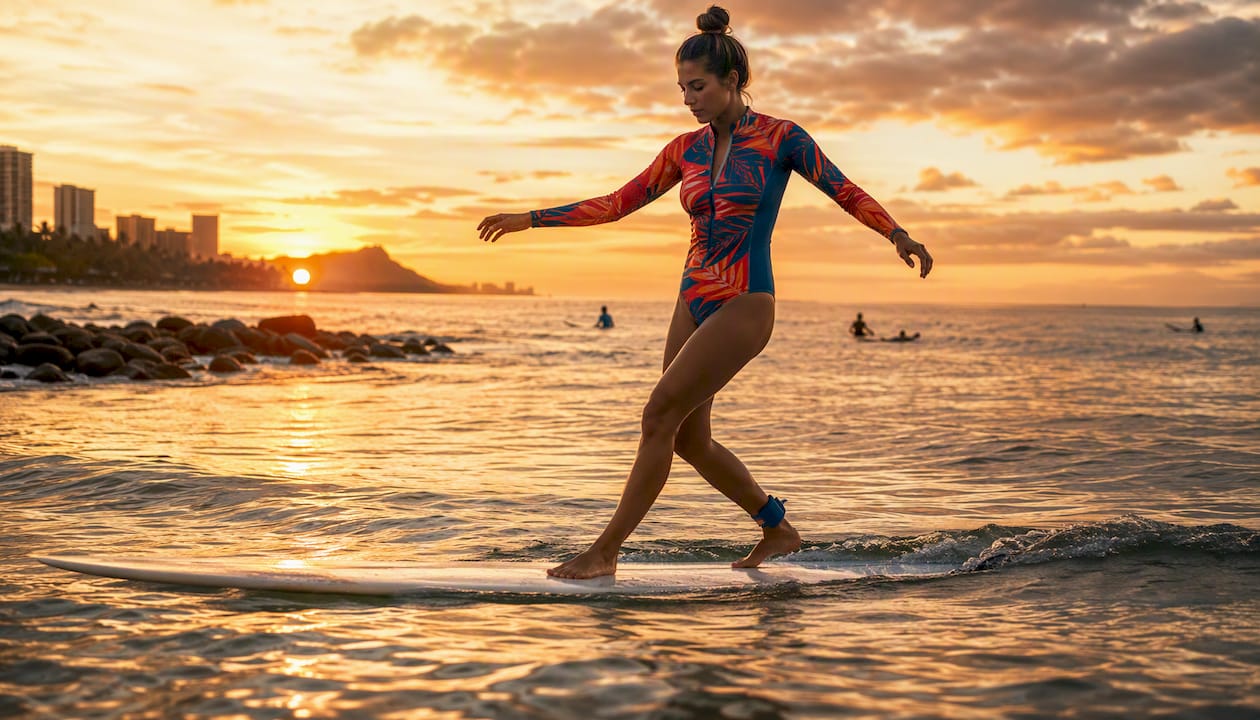
Paddle and drop in with speed. You need momentum from the start. Paddle hard, feel the wave lift the tail, and pop up quickly. A slow drop-in leaves you behind the pocket immediately.
-
Trim high on the wave face. After standing, angle the board toward the shoulder and ride high, close to the breaking lip. This is where the pocket is. Riding low on the wave face puts you in the wrong position to lock in.
-
Stall or trim-turn to lock into the pocket. This is the critical step most beginners skip. You need to slow the board slightly so the tail sinks into the steepest part of the wave. A small heel-side lean or a slight pivot on the back foot achieves this. The tail must be engaged in the wave’s power before you move forward.
-
Cross-step toward the nose. Cross-stepping is not shuffling. One foot crosses in front of the other in a deliberate, continuous motion. Keep your knees slightly bent, your weight centered, and your eyes looking down the line, not at your feet. Each step transfers weight smoothly without a sudden shift that would cause a nose dive.
-
Place your front foot at the nose. For a hang five, your front foot goes to the nose with toes over the edge; your back foot stays roughly mid-board and carries most of your weight. For a hang ten, both feet move to the nose, but the tail must be deeply locked in the pocket first.
-
Hold trim with micro-adjustments. Once at the nose, small hip and arm movements maintain balance. An arched back and arms held slightly back are not just stylistic choices. They function as counterweights that keep the tail down and the nose up.
-
Exit before the wave closes. Cross-step back toward the tail before the wave section collapses. Staying at the nose too long on a closing section ends in a wipeout.
Pro Tip: Practice cross-stepping on land before you try it in the water. Tape a line on the floor the width of your board and walk it repeatedly, crossing one foot in front of the other without looking down. An Indo Board adds the balance challenge. Ten minutes of dry-land practice translates directly to smoother footwork in the water. Balance and timing are skills you can build before you paddle out.
Why does noseriding work? The physics behind it
The board should nose-dive the moment you step forward. The fact that it does not, when done correctly, comes down to fluid mechanics and board design working together.
The central force is the Coandă effect: flowing water tends to follow a curved surface rather than detach from it. The curved underside of a longboard, combined with soft rails, causes the water flowing under the board to adhere to the surface and create a low-pressure zone. That low pressure generates lift, pulling the nose toward the wave face rather than letting it sink.
The tail acts as a mechanical fulcrum. When the tail is pressed into the wave’s steepest section, the wave’s upward force on the tail creates a lever effect. The tail goes down, the nose comes up. This is why locking in before cross-stepping is not optional. Without tail engagement, there is no fulcrum, and the physics that keep you on the nose simply do not activate.
Key forces at work:
- Coandă lift: Water adhering to the board’s curved underside creates upward pressure under the nose
- Tail fulcrum: Wave force on the engaged tail levers the nose upward
- Planing speed: The board must be moving fast enough across the wave face to maintain hydrodynamic lift
- Surface area: A longer, wider board distributes weight over more water, reducing the pressure per square inch that would otherwise cause sinking
- Rail shape: Softer, rounder rails allow water to wrap under the board more completely, enhancing the Coandă effect
Style and posture are functional, not decorative. An arched back and arms held back shift the surfer’s center of gravity rearward, which adds to the tail-down, nose-up lever effect. What looks like showmanship is actually physics.
Common noseriding mistakes and how to fix them
Most failed noserides trace back to one of four errors. Knowing which one is yours cuts the learning curve significantly.
-
Moving too early (before locking in). You cross-step before the tail is in the pocket. Fix: pause at the mid-board position after your trim-turn and feel the tail engage before taking a single step forward.
-
Too much weight on the front foot. The front foot in a hang five is largely for show. The back foot carries most of the weight. If you are nose-diving consistently, shift your back foot further toward the tail and reduce pressure on the front foot.
-
Riding too low on the wave face. If you are in the flat, slow section below the pocket, the wave has no power to engage the tail. Fix: trim higher immediately after dropping in, and stay close to the breaking section.
-
Rushed cross-steps. Hurrying the footwork causes sudden weight shifts that the board cannot absorb. Fix: slow down. Each step should be deliberate. Practice the cross-step rhythm on land until it feels automatic.
Quick-fix checklist before each attempt:
- Am I high on the wave face, near the pocket?
- Is my back foot applying pressure toward the tail?
- Can I see a clean wall ahead before I start walking?
- Are my knees bent and my weight centered?
For consistent wave riding, fixing the lock-in step alone resolves the majority of nose dives beginners experience.
How to build toward your first noseride: a progression plan
Nobody lands a hang ten in their first session. The progression below gives you measurable milestones so you know exactly where you are in the learning curve.
-
Stage 1: Balance and footwork on flat ground. Cross-step on a taped line or Indo Board for 10 minutes daily. Goal: complete 10 consecutive cross-steps without looking at your feet.
-
Stage 2: Trim and positioning in small waves. Ride waist-high waves and focus only on trimming high on the face. No cross-stepping yet. Goal: hold a trim line for 3+ seconds on five consecutive waves.
-
Stage 3: Small nose shuffles. After trimming, shuffle your front foot 6–8 inches forward and back without losing the trim. Goal: shuffle forward and return without a nose dive on three waves in a row.
-
Stage 4: First cross-steps. Attempt one or two cross-steps toward the nose on a locked-in wave. Do not try to reach the nose yet. Goal: complete two cross-steps and return to center on five waves.
-
Stage 5: Hang five. Walk to the nose and place one foot with toes over the edge. Hold for one second, then cross-step back. Goal: hold a hang five for two seconds on three waves in a session.
-
Stage 6: Hang ten. Both feet at the nose. This requires a deeply locked-in tail and a well-shaped board. Goal: hold for any amount of time without nose-diving.
Use video feedback at every stage. A phone propped on the beach or a partner filming from the shore will show you things you cannot feel in the water. Cross-training for balance and core strength accelerates every stage of this progression.
Pro surfers worth studying for noseriding style
Joel Tudor is the name most coaches point to first when discussing noseriding technique. His style is economical: minimal arm movement, a low center of gravity, and an almost casual pace of cross-stepping that disguises how precisely timed each step is. What makes Tudor worth studying is his wave selection. He rarely attempts a noseride on a section that cannot support it. Watching where he positions himself before he ever takes a step forward teaches more than watching his feet.
Soleil Errico brings a different lesson. Her approach emphasizes patience and reading the wave’s vertical wall before committing to the nose. Her coaching advice, “surf what is in front of you,” is a direct counter to the beginner instinct of rushing forward the moment the board feels stable.
What to watch for when studying noseride clips:
- Wave section chosen: Where does the surfer position themselves before cross-stepping? Are they high on the face, near the pocket?
- Tail engagement: Watch the tail. Is it submerged and pressing into the wave, or is it lifting?
- Cross-step rhythm: Count the steps. Are they slow and deliberate, or rushed?
- Body posture: Note the back arch, arm position, and where the eyes are looking
- Exit timing: When do they walk back? Before or after the section collapses?
Pause the video at the moment the surfer’s front foot reaches the nose. Check the tail position in that frozen frame. If the tail is in the pocket, the physics are working. If it is lifting, the surfer is about to wipe out, and that frame shows you exactly what not to do.
How a surf lesson accelerates your noseriding progress
A coached lesson compresses months of self-taught trial and error into a single session. The reason is simple: a coach watching from the water or the beach can see your weight distribution, your timing, and your wave selection in real time. You cannot see any of those things yourself while you are surfing.
A noseride-focused lesson with Hhsurf at Waikiki or the North Shore typically covers:
- Board selection matched to your weight and skill level
- Lineup positioning and how to read the wave for pocket location
- Coached cross-step practice, starting on the beach before entering the water
- On-water feedback during actual wave attempts
- Optional video or photo packages so you can review your own technique afterward
What first-timers can expect from a structured lesson:
- Standing up and riding waves in the first session
- Understanding the difference between trimming and noseriding
- Leaving with a clear mental model of what “locking in” feels like
- A specific drill or two to practice independently between sessions
Private surf lessons are the fastest path to noseriding specifically, because the instructor can focus entirely on your cross-step timing and wave selection rather than managing a group. When booking, ask for a noserider-style longboard, mention that your goal is cross-stepping and tip time, and request video if it is available. The first lesson experience at Hhsurf is designed to get you on waves quickly, which means you spend more time practicing and less time paddling back to the lineup.
Safety and etiquette while practicing noserides
Longboards are the heaviest, longest boards in the water. That makes them the most dangerous to other surfers if you lose control. A few non-negotiable habits keep everyone safe.
Safety checklist:
- Always wear a leash. A loose 9-foot longboard moving at wave speed is a serious hazard.
- Choose low-crowd conditions for early noseride practice. You will fall often, and you need space.
- Never cross-step on a wave that is heading toward another surfer.
- Know your exit: plan to cross-step back before the wave closes out, not after.
Etiquette specific to longboard noseriders:
- Longboarders can catch waves earlier and deeper than shortboarders. That priority comes with responsibility: do not snake the lineup or hold position in the pocket if you are not ready to ride.
- Keep your lines predictable. Erratic cross-stepping that sends the board in unexpected directions is a hazard.
- If you fall during a cross-step, cover your head with your arms and stay away from the board until it stops moving.
For a full breakdown of lineup behavior, the surfing etiquette guide covers the specific rules that apply to beginners practicing in shared breaks.
Key Takeaways
Noseriding rewards patience and precision: lock the tail into the pocket first, cross-step deliberately, and let the wave’s physics carry the nose rather than forcing your weight forward.
| Point | Details |
|---|---|
| Definition | A noseride means riding the front section of a longboard while the wave keeps the tail engaged. |
| Ideal conditions | Waist-to-head-high, peeling waves at a point break or long beach break wall. |
| Board minimum | A longboard 9 feet (275 cm) or longer with a single pivot fin gives the best results. |
| Top technique cue | Lock the tail into the pocket before cross-stepping; front foot weight causes nose dives. |
| Hhsurf lessons | Private lessons at Waikiki or North Shore Oahu include board matching, coached cross-steps, and optional video review. |
Why noseriding is worth the patience it demands
There is a version of surfing that is about power, speed, and aerial maneuvers. Noseriding is none of those things. It is slow, deliberate, and almost meditative. The first time you feel the board hold under your feet at the nose, with the wave wrapping around the tail and the water rushing past your toes, it registers as something genuinely different from any other moment in surfing. Not better, necessarily, but different in a way that stays with you.
What I find underappreciated about noseriding is how much it teaches you about wave reading. You cannot fake your way to the nose. The wave either gives you the wall or it does not, and learning to wait for that wall, rather than forcing the maneuver on a section that cannot support it, is a discipline that improves every other part of your surfing. The patience you build practicing cross-steps translates directly into better trim, better positioning, and better instincts about when to commit and when to hold back.
The longboard culture that surrounds noseriding, rooted in Hawaii and carried forward by surfers like Joel Tudor, is also worth understanding. It is a culture that values style, timing, and connection to the wave over raw athleticism. That context makes the maneuver feel like more than a trick. It feels like a conversation with the ocean.
Book a noseride-focused lesson at Hhsurf
The fastest way from “I understand the concept” to “I held a hang five for three seconds” is standing in the water with someone who can watch your footwork and tell you exactly what to fix. Reading about cross-steps and feeling them are two different things.
Hhsurf runs surf lessons at both Waikiki and the North Shore of Oahu, two locations that give you access to the kind of long, peeling waves where noseriding actually becomes possible. Private surf lessons in Waikiki are the most direct path to noseriding progress: one instructor, one student, and a session built around your specific goals. Mention cross-stepping and tip time when you book, ask for a noserider-style longboard, and consider adding the photo or video package so you can review your own technique after the session. North Shore surf lessons put you on longer point-break waves that are ideal for practicing the full cross-step sequence. Both locations are staffed by professional surfers who have coached beginners to their first hang five in a single session.
Useful sources
These are the references used throughout this guide, organized by what each one is most useful for:
- Noseriding — Wikipedia: Clean definition, variant names, and board length standards. A reliable starting point for terminology.
- How to master the art of noseriding with Soleil Errico — Surfer: Expert coaching advice from a three-time WSL longboard champion. Best for timing cues and wave selection.
- How to use physics for surfer tricks — Popular Science: Accessible explanation of the Coandă effect and fluid dynamics in surfing. Good for understanding why the technique works.
- Surf science: the physics of noseriding — Stab: Deeper dive into how style and posture function as physical counterweights. Worth reading alongside the Popular Science piece.
- How to nose ride: guide — American Surf Magazine: Practical drill recommendations including Indo Board practice and point break selection.
0 Comments