
Trimming is the art of making small, continuous weight and rail adjustments to keep your board tracking the fastest line on the wave face. Three things you can test on your next wave: check your stance width (shoulder-width apart, knees bent), apply light toe-side pressure to engage the inside rail, and fix your gaze on the section ahead rather than down at your feet. That’s the whole loop. Everything else in this guide is just making those three actions more precise and reliable.
Hold it for three seconds. Notice whether the board accelerates. That single sensation is what you’re chasing on every green wave.
Pro Tip: Before you paddle out, stand on the sand with your board and practice shifting weight front-to-back and heel-to-toe. Thirty seconds of this primes your nervous system for the micro-adjustments you’ll need in the water.
Key Takeaways
Trimming is a posture held with micro-adjustments, not a turn executed with big movements, and learning it in sequence from land drills to green waves is the fastest path to consistent wave riding.
| Point | Details |
|---|---|
| Trimming vs. carving | Trim to maintain speed and position; carve only when you need a direction change. |
| Stance fundamentals | Shoulder-width feet, bent knees, gaze forward, and corrections driven from feet, not shoulders. |
| Speed control | Front-foot pressure and upper-third positioning speed you up; back-foot pressure and lower face positioning slow you down. |
| Drill progression | Land stance, then whitewater holds, then angled green-wave takeoffs, then multi-trim sets in sequence. |
| Hhsurf lessons | Private and semi-private lessons in Waikiki deliver live coach cues and optional video review to accelerate trimming skill. |
Table of Contents
- What’s the difference between trimming and carving?
- How should you position your feet for trimming?
- Step-by-step trimming technique for frontside and backside
- How do you speed up and slow down using trim?
- When should you start trimming, and how do you pick your line?
- Common trimming mistakes and how to fix them
- The drill progression that actually builds trimming skill
- How does your board shape change the way you trim?
- What coaches actually see when students learn to trim
- Faster trimming progress with coached lessons at Hhsurf
- Sources
What’s the difference between trimming and carving?
Trimming and carving solve different problems: trimming keeps your speed and position with subtle weight shifts; carving is a stronger, rail-tilting move that changes your direction fast. Beginners often reach for a carve when a trim would do the job better, and the result is lost speed or a wipeout.
Think of it this way. On a fast-peeling point break, the wave is doing the work. Your job is to stay in the power pocket, not redirect. That calls for trimming: tiny heel-to-toe and fore-aft adjustments that keep the board on the speed line without disrupting its momentum. On a slow, mushy beach break where the wave is dying in front of you, a carve redirects you into a new section. Same ocean, completely different tool.
The practical rule: if the wave is giving you speed, trim to keep it. If the wave has stopped giving you speed, carve to find a new source of it. Beginners who learn this distinction early stop fighting waves and start working with them.
A beginner should default to trimming for the first several sessions after learning to pop up. Carving requires more commitment and a faster read of the wave. Trimming, by contrast, is forgiving: a small correction is easy to reverse, while a committed carve is not.
How should you position your feet for trimming?
Stance is where trimming either works or falls apart. Here’s a repeatable checklist:
- Feet shoulder-width apart, positioned roughly over the board’s center stringer, with your back foot near the fins and your front foot between the fins and the midpoint of the board.
- Knees bent at roughly 30–40 degrees. Straight legs kill your ability to absorb the wave and make micro-adjustments.
- Hips square-ish to the rail you’re trimming toward, chest low and forward, not upright.
- Gaze forward along the wave face, not down at the nose. Where your eyes go, your weight follows.
- Arms relaxed and slightly out for balance, not locked at your sides.
Your front foot is the accelerator. Pressing forward drives the nose down slightly, increases planing surface contact, and pulls speed from the wave. Your back foot is the brake: shift weight toward it and the tail sinks, creating drag that slows you down. Heel-to-toe pressure steers the rail. (https://www.thebeginnersurfer.com/how-to-turn-on-a-surfboard-for-beginners/): toe-side pressure on a frontside ride engages the inside (toe) rail and draws you up the face; heel-side pressure does the same on a backside ride.
The scale of these adjustments surprises most beginners. The corrections involve very subtle pressure, not a full body lunge. Micro-adjustments maintain rail engagement and planing. (https://cornishwave.com/beginners-guide-to-surfing/trimming-carving-bottom-turns/); large corrections signal you’ve already drifted out of position and are now playing catch-up.
Pro Tip: Cross-training for balance, like single-leg balance work and ankle stability drills, directly improves your ability to hold these micro-adjustments under pressure. Balance and posture training pays off fast in the water.
Step-by-step trimming technique for frontside and backside
The sequence is the same whether you’re riding frontside or backside: angle the takeoff, establish speed, find the trim posture, hold micro-adjustments, then exit cleanly.
Frontside trimming
Step 1 — Angled takeoff. As you pop up, angle your board slightly toward the open face rather than straight toward the beach. This puts you on the wave face immediately instead of dropping to the flats.
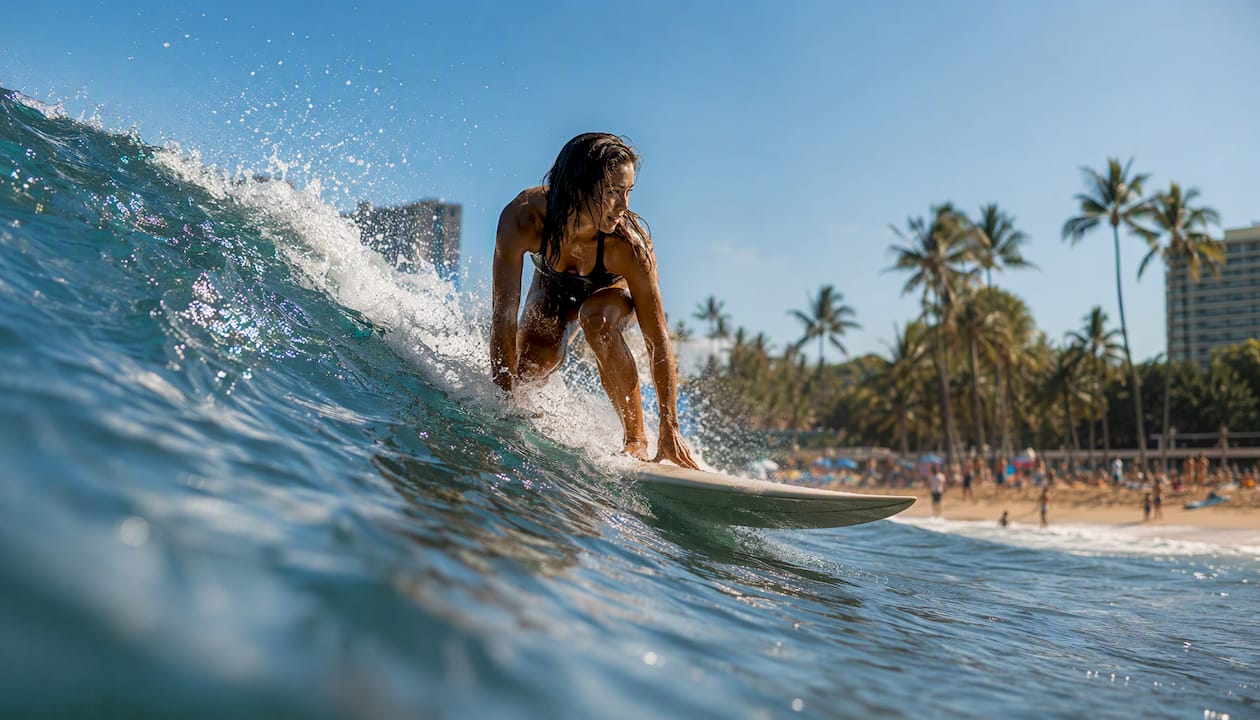
Step 2 — Establish speed. In the first two seconds after the pop-up, let the wave accelerate you. Resist the urge to pump. Front-foot pressure is light here; you’re just stabilizing.
Step 3 — Find the trim posture. Lower your center of gravity, bend your knees, and apply light toe-side pressure. You should feel the inside rail engage. The board will begin tracking across the face rather than down it.
Step 4 — Hold and micro-adjust. The upper third of the wave face often provides the most efficient trim line. Aim to stay there. If you feel the board slowing, shift slightly forward. If the nose starts to pearl, shift slightly back. These are millimeter-scale corrections.
Step 5 — Read your visual cues. Watch the rail where it meets the water. A clean, thin line of spray means good engagement. A wide, churning spray means the rail is digging too hard. A flat, no-spray exit means you’ve lost the rail entirely and need to re-engage.
Step 6 — Exit. As the wave closes out or flattens, straighten your weight distribution and ride it out. Don’t force a turn you don’t need.
Backside trimming
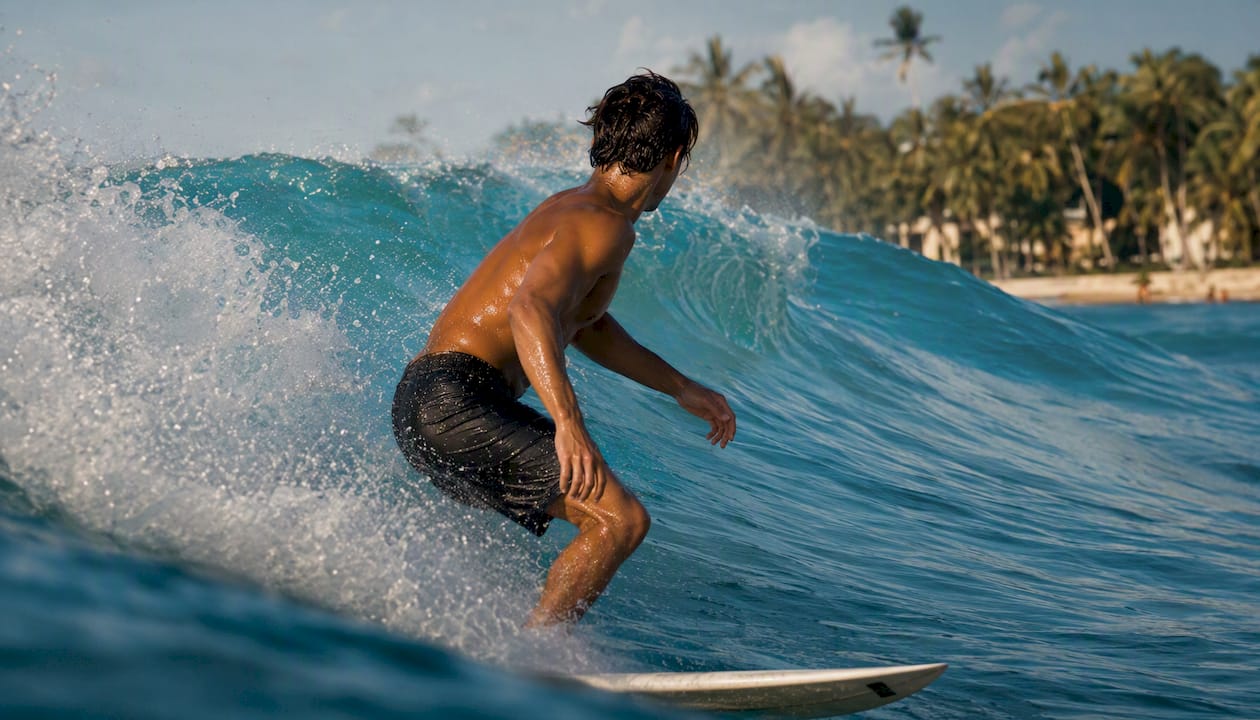
The sequence mirrors frontside, with two key differences. Your heel-side rail is now the inside rail, so apply light heel pressure to engage it. Head and shoulder position matter more on the backside because you’re facing away from the wave: turn your head to look over your lead shoulder toward the open face. Where your head points, your trim line follows. Heel-side pressure for backside trim is the single most common coaching cue for riders struggling to hold a backside line.
How do you speed up and slow down using trim?
Speed control through trimming is about weight placement and rail engagement, not pumping. Pumping burns energy and disrupts the smooth line you’re trying to hold. Here’s what to do instead:
To speed up:
- Shift weight slightly toward your front foot (not a lunge, a lean).
- Climb toward the upper third of the wave face where the slope is steeper and gravity does more work.
- Apply light toe-side (frontside) or heel-side (backside) pressure to engage the inside rail and increase planing efficiency.
- Keep your chest low; standing tall creates wind resistance and lifts your center of gravity, both of which cost speed.
To slow down:
- Shift weight toward your back foot to increase tail drag.
- Drop your stance slightly lower, which widens your base and increases friction.
- Move toward the lower section of the wave face where the slope is gentler.
- Ease off the inside rail pressure so the board runs flatter.
The most common overcorrection is a sudden weight lunge that sends the board off the trim line entirely. If you feel yourself losing the line, the fix is not a bigger correction. It’s a smaller one. Large corrections mean you’ve drifted out of position; the goal is to never need them by staying ahead of the wave with constant, tiny adjustments.
Pro Tip: If the wave is giving you speed, stop doing things. One of the most repeated instructor cues is “trust the wave.” Unnecessary pumping or turning bleeds the speed the wave is handing you for free.
When should you start trimming, and how do you pick your line?
Start trimming the moment you pop up. Not after you’ve stabilized, not after you’ve looked around. The trim begins with the takeoff angle.
The takeoff is where the trim line is set. An angled takeoff toward the open shoulder puts you on the face immediately. A straight takeoff toward the beach sends you to the flats, and no amount of trimming recovers that position efficiently.
For most waves, position yourself in the upper third of the face just below the lip. On a steep, hollow wave, that line sits higher and closer to the lip, where the slope provides maximum gravitational drive. On a mellow, slower wave, the ideal trim line shifts lower on the face where there’s still enough slope to maintain momentum without outrunning the wave entirely.
Wave-by-wave guidance:
- Point break: The wave peels predictably. Set your trim line early and hold it. The wave does the work; your job is restraint.
- Beach break: The wave shape changes fast. Read the section ahead and adjust your trim line every few seconds. Be ready to drop lower if the wave fattens.
- Mellow/slack wave: Trim from the middle of the face. Use more front-foot pressure to generate speed since the slope isn’t providing much.
Knowing how different breaks peel and where to position yourself before you paddle out saves you from reactive trimming, which is always a step behind.
Common trimming mistakes and how to fix them
Most trimming errors fall into a short list of repeatable patterns. Here’s what they look like and what to do about them:
| Mistake | What you’ll see | Fix |
|---|---|---|
| Weight too far back | Board stalls, tail drags, ride ends early | Shift front foot pressure forward; lower chest toward board |
| Over-correcting with big lunges | Board wobbles, you lose the rail, wipeout | Reduce correction size; think “10% shift,” not “full lean” |
| Leaning upper body instead of feet | Shoulders twist, hips misalign, board skids | Drive corrections from feet and knees, not shoulders |
| Looking down at the nose | Weight drops forward unevenly, nose pearls | Fix gaze on the section ahead; trust peripheral vision |
| Pumping when the wave provides speed | Speed bleeds off, rhythm breaks | Stop pumping; hold the trim and let the wave work |
| Riding too low on the face | Board loses speed on flat water | Climb toward the upper third of the face |
Instructors diagnose these errors from two cues: board behavior and student posture. A stalling board almost always means weight is too far back or the rider is riding too low on the face. A wobbling board usually means over-correction. A student with twisted shoulders is steering with their upper body instead of their feet. Fixing the posture fixes the board behavior.
The drill progression that actually builds trimming skill
The fastest path to reliable trimming runs through a specific sequence. Measured progression from land to whitewater to green waves lets you isolate each variable before adding the next layer of complexity.
-
Land stance drill (5 minutes before each session). Stand on your board on the sand. Practice shifting weight front-to-back and heel-to-toe in small increments. Feel where the board tips. Identify the neutral position where it sits flat. Repeat until the shifts feel automatic.
-
Whitewater trim drill. Paddle into broken whitewater, pop up, and immediately apply light toe-side pressure. Hold the trim for three seconds. Don’t turn, don’t pump. Just hold. Repeat on 10 consecutive waves. The goal is to feel the rail engage and disengage without losing balance.
-
Angled green-wave takeoff. Paddle for a green wave and angle your takeoff toward the open shoulder. Pop up and hold the trim line for as long as the wave allows. One trim per wave, no turns. Count how many seconds you hold the line.
-
Multi-trim sets. Once you can hold a single trim for 5+ seconds consistently, introduce a second micro-adjustment mid-ride. Speed up, then slow down, then hold. This is where trimming becomes a real tool rather than a one-time action.
Progression milestone: Three to five successful trims in a row, each held for at least five seconds, is the reliable signal that you’re ready to move from drill mode into free surfing. That’s the same benchmark instructors use to advance students from structured practice to open-wave riding.
Pro Tip: At Hhsurf, instructors use a short set of verbal cues repeated across every drill: “stance,” “look,” “small shift,” “hold.” Hearing those four words in sequence builds a habit loop faster than any amount of self-directed practice. If you’re surfing solo, say them out loud to yourself.
How does your board shape change the way you trim?
Board design changes how much input trimming requires, not whether trimming works.
Longboards (9+ feet): The extra length and volume mean the board planes easily and holds a trim line with minimal input. Small weight shifts produce noticeable results. The risk is over-steering: a tiny heel-to-toe shift on a longboard moves the rail more than the same shift on a shortboard. Keep corrections even smaller than you think you need.
Mid-lengths (7–8.5 feet): These boards sit between the two extremes. They respond to trimming well but require more active input than a longboard. Foot position matters more here: riding too far back kills speed fast, while riding too far forward makes the nose unstable.
Shortboards (under 7 feet): Shortboards need more active rail work and faster micro-adjustments. The reduced volume means the board stops planing quickly if weight shifts wrong. On a shortboard, the difference between a clean trim and a stall is often just a few millimeters of fore-aft placement. Train yourself to feel the board rather than watch the nose.
Fin setup: A tighter cluster (fins closer together) gives more hold and rail bite, which helps trimming on steep waves. A wider cluster gives a looser feel that suits mellow waves. If your board keeps spinning out during a trim, check whether your fins are too loose for the wave speed.
If a board stalls mid-trim, shift forward first. If it outruns the pocket, shift back and drop lower on the face. If it spins out, ease off the rail pressure and re-engage gradually.
What coaches actually see when students learn to trim
Most beginners arrive thinking trimming is a turn they haven’t learned yet. It’s not. It’s a posture they haven’t held yet. The shift from “trying to do something” to “holding a position while the wave does the work” is the real milestone instructors watch for.
In a typical lesson progression, the first checkpoint is a clean pop-up with a stable stance. The second is the student holding that stance for more than two seconds without correcting with their upper body. The third is the student making a deliberate front-foot shift and feeling the board respond. That third checkpoint is when trimming clicks.
Instructors calibrate the lesson around that sequence: balance drills first, then whitewater trimming, then a green wave with a coached takeoff angle. Carving doesn’t enter the picture until trimming is reliable. Introducing carving too early is one of the most common ways students plateau, because they start using turns to solve problems that trimming would handle more efficiently.
Faster trimming progress with coached lessons at Hhsurf
Reading about trimming and doing it are two different things. The gap closes fastest when a coach watches your feet, not your face, and tells you in real time whether your weight is where it needs to be.

At Hhsurf (Hans Hedemann Surf School in Waikiki), private and semi-private surf lessons put an experienced instructor in the water with you, watching your rail engagement and posture on every wave. The feedback loop that takes months of solo practice to build happens in a single session. Instructors use the same verbal cue sequence on every wave, so the habit forms fast. Optional on-water video review lets you see exactly what your feet are doing, which no amount of self-assessment can replicate.
Ready to stop guessing and start holding the line? Book a surf lesson in Waikiki and get coached trimming feedback from your first wave.
Sources
- Trim and Down the Line Surfing · Rapture
- What Makes Really Good Trimming, Carving & Bottom Turns
- How To Turn on a Surfboard: Trimming VS Carving
- Why trim is the Holy Grail of your post-pop-up ride – The Wipeout Weekly
- How to turn on a surfboard for beginners
0 Comments