
Designate one distraction-free adult as the water watcher, choose a lifeguarded beach, keep non-swimmers within arm’s reach at all times, and position everyone inside the guarded swimming zone. That is the core of any solid supervising children surf beach guide, and everything else builds on those four actions.
- Pick a beach with an active lifeguard on duty before you leave home.
- Assign one adult as the water watcher — phone down, no alcohol, eyes on the water only.
- Non-swimmers and children under 6 stay within arm’s reach (touch supervision) at all times.
- Check NOAA/NWS beach forecasts before departure for surf height, rip-current risk, and flag status.
- Pack a U.S. Coast Guard–approved life jacket for every non-swimmer.
Pro Tip: Dress children in fluorescent pink, yellow, or red swimwear. High-visibility colors stand out sharply against white foam and blue water, making it far easier to spot a child who drifts.
The U.S. Lifesaving Association (USLA) consistently links lifeguard presence to dramatically lower drowning rates. The American Red Cross and the U.S. Coast Guard both reinforce the same baseline: the right beach, the right gear, and one focused adult watching at all times.
Table of Contents
- How do you pick a safe beach and read surf conditions?
- What should you pack and plan before leaving home?
- How to actively supervise children in the surf
- What surf hazards should you recognize and teach your kids?
- What rules should you set by age and skill level?
- Why do professional surf lessons make children safer?
- What do you do if a child is in danger or goes missing?
- Your printable beach supervision checklist
- Key Takeaways
- The part most parents get wrong
- Hhsurf gives your child a safer start in the water
How do you pick a safe beach and read surf conditions?
Start with lifeguard coverage. Guarded beaches show far lower drowning rates than unguarded ones, and a USLA-affiliated lifeguard stand gives you a trained responder within seconds if something goes wrong. For families with young or beginner surfers, that coverage is not optional.

Rip currents account for the majority of surf rescues at surf beaches. That single figure explains why beach selection matters more than most parents realize.
Reading the flag system
| Flag color | Meaning | Recommended action |
|---|---|---|
| Green | Low hazard, calm conditions | Safe for most swimmers |
| Yellow | Moderate surf or currents | Caution; stay close to shore |
| Red | High surf or strong currents | Experienced swimmers only |
| Double red | Beach closed to swimming | Stay out of the water |
| Purple | Dangerous marine life present | Stay out; ask lifeguard |
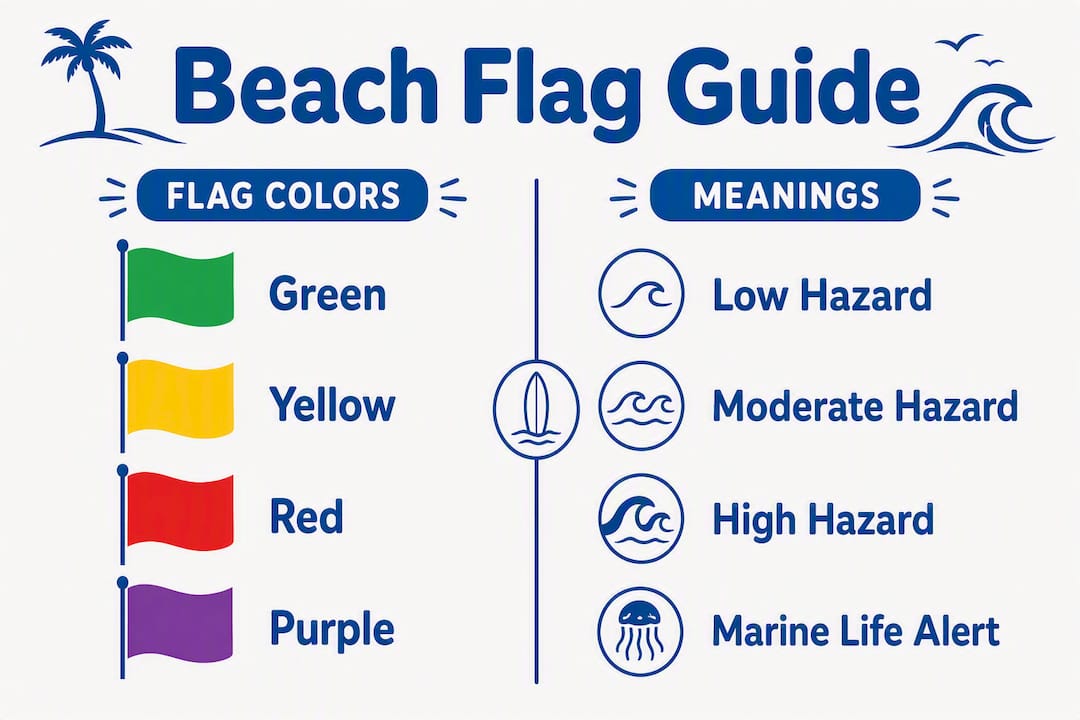
Check the NWS marine forecast and the NOAA surf outlook the night before and again the morning of your visit. Conditions shift fast, especially in summer.
On arrival, scan for outflow channels (darker, choppy water moving seaward), exposed rocks, shorebreak that dumps hard on dry sand, and crowded lineups. If any of those are present and the lifeguard confirms elevated risk, choose a different section of beach or a different day.
Pro Tip: Set up your towels and gear with a direct sightline to the water. Pick a fixed landmark — a lifeguard tower, a bright umbrella, a pier piling — and use it as the boundary marker children must stay inside.
What should you pack and plan before leaving home?
Preparation before you leave cuts on-beach indecision and keeps supervision tight from the moment you arrive.
Packing checklist
- U.S. Coast Guard–approved life jacket, sized to the child (not an inflatable pool toy)
- Broad-spectrum SPF 30+ sunscreen; FDA guidance recommends avoiding sunscreen on infants under 6 months
- Rashguard in a bright, high-visibility color
- Wetsuit or thermal layer if water temperature is below 65°F
- Whistle for the supervising adult
- Basic first-aid kit (bandages, antiseptic wipes, tweezers)
- Charged phone in a waterproof case
- Spare dry clothing and towels
- Water and snacks to prevent fatigue-related lapses in judgment
Check the surf-ready checklist for a more detailed pre-lesson readiness breakdown.
The family brief (do this before you leave, not at the beach)
Run through these five points with your children at home:
- Where to play: identify the guarded zone on a map or photo; explain they stay inside it.
- Meeting point: the lifeguard tower is the go-to spot if anyone gets separated.
- Buddy rule: no one goes in the water alone, ever.
- Hand signals: agree on three signals before you go (thumbs up = I’m fine, wave overhead = I need help, crossed arms = we’re leaving).
- Who to find: if a child cannot see you, they go directly to the lifeguard stand and give their name.
Also confirm the lifeguard schedule for your beach. Some beaches have seasonal or part-time coverage; arriving outside those hours changes your risk profile entirely.
How to actively supervise children in the surf
Active supervision means one designated adult whose only job is watching the water. No scrolling, no reading, no conversations that pull your eyes away. If you are in a group, rotate the role every 20–30 minutes so no one loses focus.
Positioning yourself correctly
Non-lifeguard supervisors should stand in shallow water with their feet on the bottom. That stable footing lets you move quickly toward a struggling child without committing to a swim rescue you may not be able to complete safely. Staying chest-deep or deeper removes your ability to react fast.
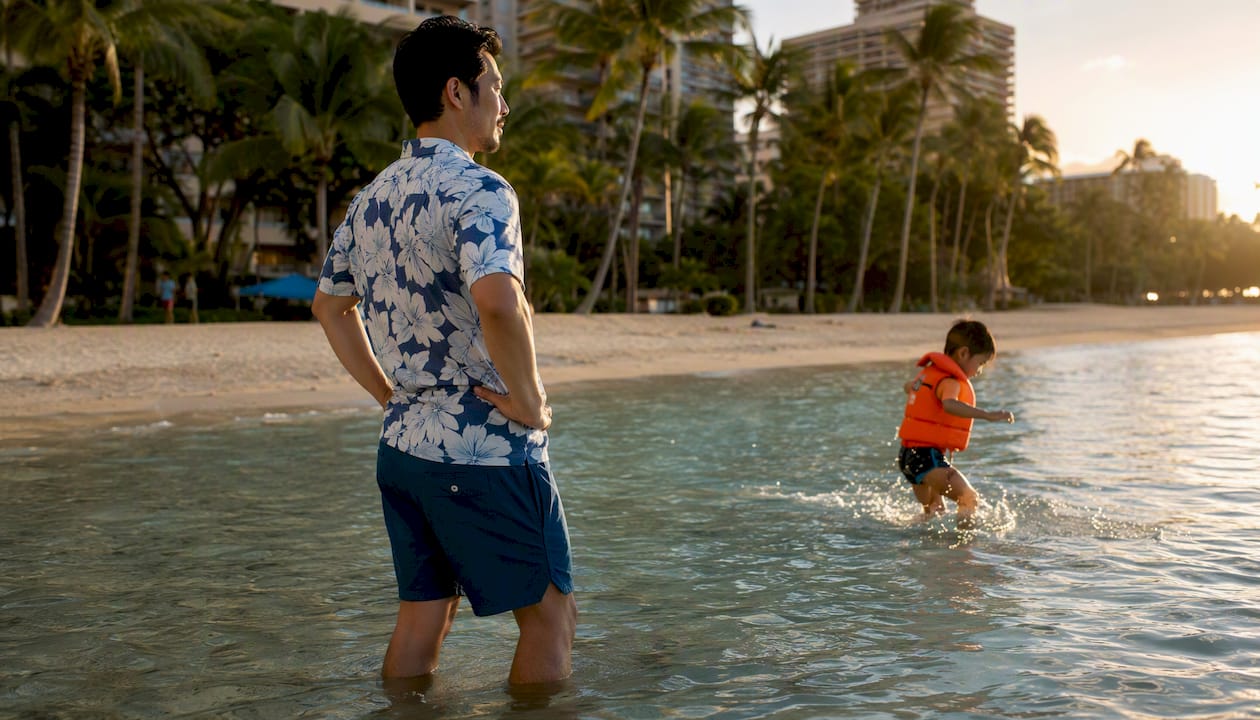
For toddlers and non-swimmers, touch supervision means a hand on the child or within immediate grabbing distance at all times. No exceptions, even in ankle-deep water. A child can go under in seconds in water that barely covers their knees.
Managing a group
- Split children by ability: stronger swimmers can go slightly deeper, but each group needs its own assigned watcher.
- Use landmarks to set visible boundaries for each group.
- Keep groups small. Activity guidance from SupportAdventure recommends supervisors stay where their feet touch the ground and use small, clearly defined zones.
- Rotate supervision roles on a timer, not on feel. Fatigue and distraction creep in faster than most adults expect.
Pro Tip: Pre-agree on hand signals for “I’m fine,” “I need help,” and “we’re leaving” before anyone enters the water. Wind and wave noise make shouting unreliable — a clear visual signal works when a voice does not.
What surf hazards should you recognize and teach your kids?
Rip currents
Rip currents can flow at up to 8 feet per second — faster than an Olympic swimmer. They look like a darker, choppier channel of water moving away from shore, sometimes with foam or debris on the surface. Teach children this escape sequence:
- Stay calm. Panicking wastes energy.
- Float on your back if you feel pulled out.
- Swim parallel to the shore, not against the current.
- Once free of the pull, angle back toward the beach.
- Wave and shout for help if you cannot make it back.
Rip currents are involved in roughly 80% of lifeguard rescues at surf beaches. Knowing the escape steps before entering the water is not optional.
Shorebreak and sneaker waves
Shorebreak dumps directly on dry or shallow sand and can cause serious head and neck injuries. Teach children to jump waves feet-first and never dive headfirst into breaking surf. Sneaker waves arrive without warning on otherwise calm shores; children should never turn their backs to the ocean.
Marine life and purple flags
A purple flag means dangerous marine life has been spotted — jellyfish, stingrays, or sharks. Stay out of the water until the flag comes down or a lifeguard clears the area.
Scripts to rehearse with children
Practice these two short phrases at home:
- Calling for help: “Help! I need a lifeguard! [Child’s name] is in the water at [landmark]!”
- Getting to the meeting point: “If I can’t find you, I go to the lifeguard tower and say my name.”
Role-play both scenarios. Children who have rehearsed a response act on it; children who have only heard it described often freeze.
What rules should you set by age and skill level?
Age and ability determine gear requirements, distance limits, and how long a session should run.
| Age / ability | Life jacket required | Distance from shore | Max session |
|---|---|---|---|
| Under 6 / non-swimmer | Yes — USCG-approved | Touch supervision only | 20–30 min |
| 6–9 / beginner | Yes in open water | Within arm’s reach | 30 min |
| 10 / developing swimmer | Recommended | Visible, within guarded zone | 45 min |
| Teen / confident swimmer | Situational | Inside guarded zone | — |
HealthyChildren.org (AAP) is explicit: inflatable pool toys, water wings, and swim rings are not substitutes for a USCG-approved life jacket. They deflate, slip off, and give false confidence.
Exit the water at the first sign of shivering, blue lips, or fatigue. Cold water accelerates heat loss far faster than cold air, and a tired child loses coordination quickly. Short sessions with warm-up breaks reduce exhaustion-related incidents more reliably than any other single rule.
For age-specific guidance on surf lessons, including prerequisites and board sizing by age, that resource covers the specifics in detail.
Beyond life jackets, bring helmets for bodyboard or shortboard sessions in rocky or crowded breaks, a whistle for the supervising adult, and bright rashguards for every child. Choosing the right board by size and volume also reduces collision risk significantly.
Why do professional surf lessons make children safer?
Lessons do more than teach technique. A qualified instructor delivers an on-sand safety briefing before anyone touches the water, covering rip currents, flag systems, falling safely, and how to handle a wipeout. Children who learn these concepts in a structured setting retain them better than children who pick up surfing informally.
Low instructor-to-student ratios mean each child gets corrected before a bad habit becomes a dangerous one. Instructors also select appropriately sized, soft-top boards that reduce impact injuries — a detail parents choosing rental equipment often overlook.
What to look for when selecting lessons
- Instructor certifications and first-aid training
- Group size (smaller is safer for beginners)
- Age-appropriate board selection policy
- Mandatory on-sand safety briefing before water entry
- Clear leash and life-jacket policies
- Defined supervision zones in the water
Lessons complement parental supervision; they do not replace it. A child in a lesson still benefits from a parent watching from the shore. For first-timers or children who are nervous in the water, private surf lessons offer one-on-one instructor attention that builds confidence faster than a group setting.
Pro Tip: Ask any surf school how they handle a student who panics or gets caught inside. A school with a clear, rehearsed answer has thought through safety. One that hesitates probably has not.
For guidance on choosing a qualified kids’ surf instructor, the criteria above translate directly into interview questions you can ask before booking.
What do you do if a child is in danger or goes missing?
Child in the water
- Shout to the lifeguard immediately and point at the child continuously.
- Throw any flotation device within reach — a life ring, a boogie board, a cooler lid.
- Do not enter the water alone unless you are a trained rescuer. A panicking child can push an untrained adult underwater.
- Call 911 if a lifeguard is not present. Say: “Child in the water at [beach name], near [landmark]. Approximately [age]. I am at [your location].”
- Keep pointing at the child’s last known position — do not look away.
Missing child
- Do a fast 360-degree perimeter sweep of your immediate area first (30 seconds maximum).
- Alert the nearest lifeguard immediately. Give the child’s name, age, clothing color, and last known location.
- Use your pre-agreed family code word to signal other adults in your group.
- The lifeguard stand is the designated meeting point — send one adult there immediately in case the child is already heading there.
- Call 911 if the child is not found within 5 minutes.
Suspected head or spinal injury
Do not move the child. Stabilize the head and neck in the position you found them, keep them as still as possible, and wait for trained emergency responders. Moving a spinal injury incorrectly causes more damage than the original impact.
This guide provides general safety information, not medical or legal advice. Confirm current beach regulations and emergency procedures with local authorities and a qualified professional.
Your printable beach supervision checklist
Before you leave home
- Check NOAA/NWS forecast and flag status for your beach
- Confirm lifeguard hours and coverage
- Pack USCG-approved life jackets for non-swimmers
- Brief children on meeting point, buddy rule, and hand signals
- Charge your phone; pack a whistle
At the beach
- Locate the lifeguard stand immediately on arrival
- Set up with a direct sightline to the water
- Establish a visible boundary landmark for children
- Assign the water-watcher role before anyone enters the water
- Confirm children know the meeting point
Supervision roles
- Water watcher: phone away, no alcohol, eyes on the water
- Rotate every 20–30 minutes in groups
- Non-swimmers: touch supervision at all times
- Older children: buddy system, stay inside guarded zone
Emergency steps
- Child in water: shout to lifeguard, point, throw flotation, call 911
- Missing child: sweep perimeter, alert lifeguard, use code word, call 911 if not found in 5 minutes
Do and don’t
- Do face the water at all times when on water-watcher duty
- Do use USCG-approved life jackets for non-swimmers
- Do exit at first sign of shivering or fatigue
- Don’t turn your back to the ocean
- Don’t rely on inflatable toys as flotation devices
- Don’t attempt a water rescue unless you are trained
Key Takeaways
Safe beach supervision for children comes down to one designated adult watching without distraction, a lifeguarded beach, USCG-approved life jackets for non-swimmers, and a rehearsed plan for emergencies.
| Point | Details |
|---|---|
| Lifeguarded beach first | Rip currents account for the majority of surf rescues; lifeguard presence dramatically lowers drowning risk. |
| Designated water watcher | One adult, no phone, no alcohol, eyes on the water — rotate every 20–30 minutes in groups. |
| Touch supervision for young children | Non-swimmers and children under 6 stay within arm’s reach at all times, even in shallow water. |
| Rip current escape steps | Stay calm, float, swim parallel to shore, then angle back; rehearse this with children before entering the water. |
| Hhsurf kids’ lessons | Hhsurf’s structured lessons include on-sand safety briefings, low instructor ratios, and age-appropriate boards for children. |
The part most parents get wrong
Most beach-safety advice focuses on gear and rules, which is correct but incomplete. The gap I see most often is the handoff moment: the point where one adult stops watching and another has not yet started. That 90-second window is when incidents happen. A rotation schedule only works if both adults explicitly confirm the transfer — “You have the water” and a verbal acknowledgment back. Without that confirmation, both adults assume the other is watching.
The second thing parents underestimate is how quickly conditions change. A beach that looks calm at 9 AM can have a strong rip running by 11 AM as the tide shifts. Checking NOAA forecasts before you leave is good. Checking the flags again when you arrive, and once more mid-session, is better.
Professional lessons genuinely help with the ocean-awareness piece. A child who has had even one structured lesson with a qualified instructor understands rip currents, knows how to fall safely, and has practiced calling for help. That knowledge does not expire after the lesson ends. It carries into every future beach visit. For parents planning a trip to Waikiki, Hhsurf’s kids’ surf lessons build exactly that foundation in a single session.
Hhsurf gives your child a safer start in the water
Reading a guide prepares you. A lesson prepares your child.
Hhsurf’s family surf lessons in Waikiki are built around the things that actually reduce risk for young surfers: small groups, soft-top boards sized to each child, a full on-sand safety briefing before anyone enters the water, and instructors who know Waikiki’s conditions well enough to keep beginners in the right zones. Children learn to read the ocean, fall safely, and handle a wipeout — skills that make every future beach visit safer, not just the lesson day.
Parents who want one-on-one attention for a nervous or younger child can book a private lesson in Waikiki, where the instructor’s focus stays on one student the entire session. Check availability and book a lesson directly on the Hhsurf site.
0 Comments