
Surf instructor feedback is fast, prioritized, and safety-first. Your coach gives you one correction per wave, not five. That single focus is intentional: one prioritized correction per session is what actually moves the needle, because your nervous system can only adopt one new motor pattern at a time. Hans Hedemann Surf School’s teaching methodology is built around exactly this principle, and it’s why most beginners at Hhsurf stand up within their first lesson. The four stages of learning framework explains the rest: you move from “I don’t know what I’m doing wrong” to “I do it right without thinking” through repeated, targeted feedback, not through volume of attempts alone.
The short version of what to expect:
- Your instructor briefs you on safety before you touch the water
- On the sand, you practice the pop-up until the motion feels familiar
- In the water, you get short, single-word cues timed to each wave
- After the session, a debrief locks in the one correction that matters most
Listen for that one priority correction and apply it on your very next wave. Everything else in this guide explains how and why that process works.
Table of Contents
- What happens on the beach before you paddle out?
- How do instructors coach you in the water?
- What are the four feedback types instructors use?
- How does video analysis speed up your progress?
- What do common instructor cues actually mean?
- How do instructors measure your progress as a beginner?
- How do you lock in feedback between lessons?
- How do you get the most out of your post-lesson debrief?
- Key Takeaways
- What coaches wish every beginner understood before their first lesson
- Ready to get structured, filmed feedback at Hhsurf?
- Further reading and sources
What happens on the beach before you paddle out?
The beach portion of a lesson is not a formality. It’s where instructors front-load the information that keeps you safe and shortens the time you spend confused in the water.
Safety briefing first. Every instructor covers three non-negotiables: wave etiquette (the “don’t drop in” rule, which means never taking a wave someone else is already riding), how to fall safely away from your board, and rip current awareness. If you get caught in a rip, the instinct to swim straight back to shore works against you. The correct move is to swim parallel to the shoreline until you exit the current, then angle back in.
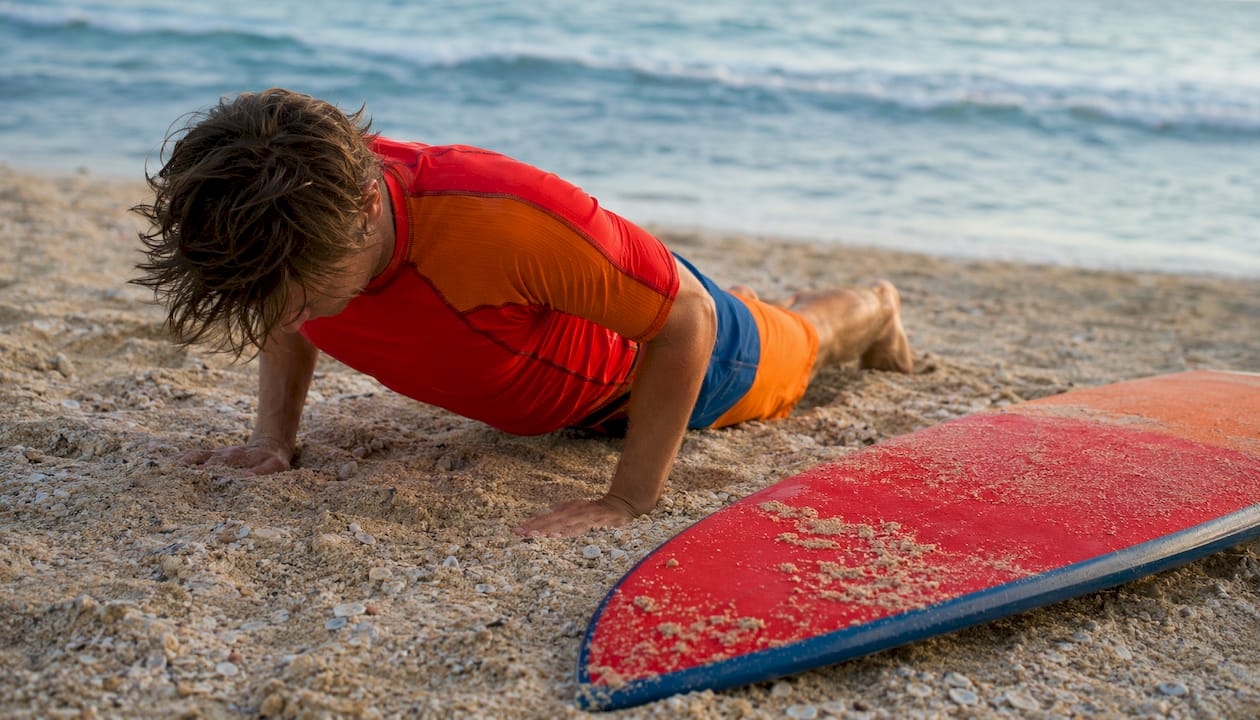
Demonstration and sand pop-up practice. Your instructor models the pop-up, then guides you through it on the sand. This isn’t busywork. Repeating the motion on flat ground builds the muscle memory you’ll need when a wave is pushing you and you have about one second to react. Most instructors will have you do 5–10 reps before entering the water.
Logistics and lineup positioning. Coaches also cover board handling, where you’ll be in the water relative to other surfers, and what the coach-to-student ratio looks like for the session. Hhsurf keeps ratios small so instructors can give each student real attention, not just general encouragement from a distance.
What to bring and how to prepare:
- Arrive hydrated and apply sunscreen before you get to the beach
- Wear a rash guard or wetsuit appropriate for the water temperature
- Bring water shoes if the beach has a rocky entry
- Leave jewelry and loose accessories in your bag
Pro Tip: Arrive 10 minutes early and run through 5–10 pop-ups on your own before the lesson starts. Instructors notice students who’ve already warmed up the movement, and you’ll spend more of your paid water time actually surfing.
The numbered sequence your instructor follows on the beach:
- Welcome and equipment check (board size, leash, wax)
- Safety briefing: wave etiquette, falling technique, rip awareness
- Instructor demonstration of the pop-up
- Student pop-up practice on sand with coach correction
- Warm-up routine and stretch
- Walk to the water entry point with positioning instructions
How do instructors coach you in the water?
Once you’re in the water, the feedback style shifts completely. Long explanations disappear. What replaces them are short, timed cues delivered at the exact moment you need them.
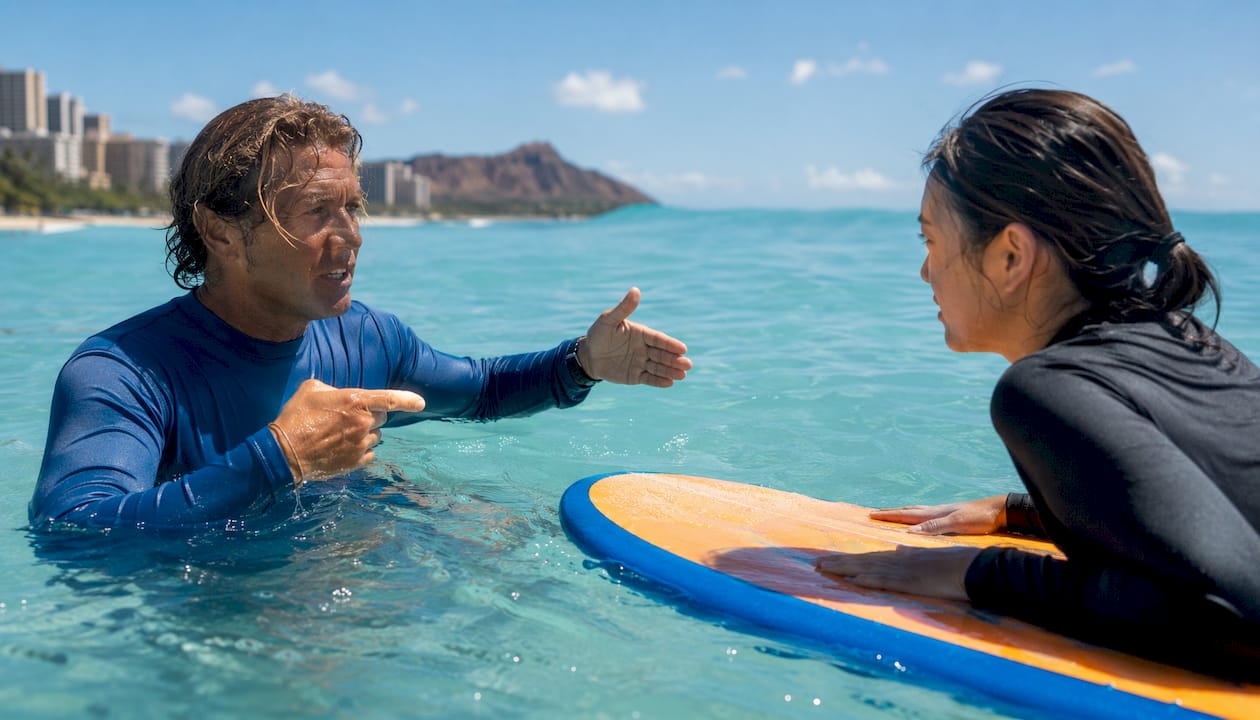
Real-time verbal cues. A good instructor doesn’t talk while you’re paddling into a wave. They wait until the right moment, then give one word: “paddle,” “pop,” “look up.” The timing matters as much as the word itself. A cue shouted two seconds late is useless.
Coach positioning. Your instructor stands or paddles in a spot that gives them a clear sightline to your board and body, while staying close enough to assist if needed. In whitewater, that usually means standing waist-deep to the side and slightly behind you. As you progress to catching green waves, the coach may paddle nearby or watch from the beach with a clear view of your takeoff.
Hands-on versus hands-off. Early in a first lesson, an instructor may physically stabilize your board or guide your hips into the correct stance. This is normal and temporary. The goal is to give you the physical sensation of correct positioning so you have something to aim for. As your balance improves, the hands-on support fades and the verbal cues take over.
The micro-feedback loop that drives improvement:
- You attempt a wave
- The instructor gives one correction immediately after
- You paddle back and apply that correction on the next wave
- The loop repeats
Pro Tip: After each wave, paddle back to your instructor before the next set arrives. That 30-second window is when the correction is freshest and most useful.
Surfing is a skill sport, not a strength sport. Most missed waves come from hesitation or poor paddle timing, not lack of fitness. When your instructor tells you to “commit,” that’s the correction that unlocks wave-catching more than any physical adjustment.
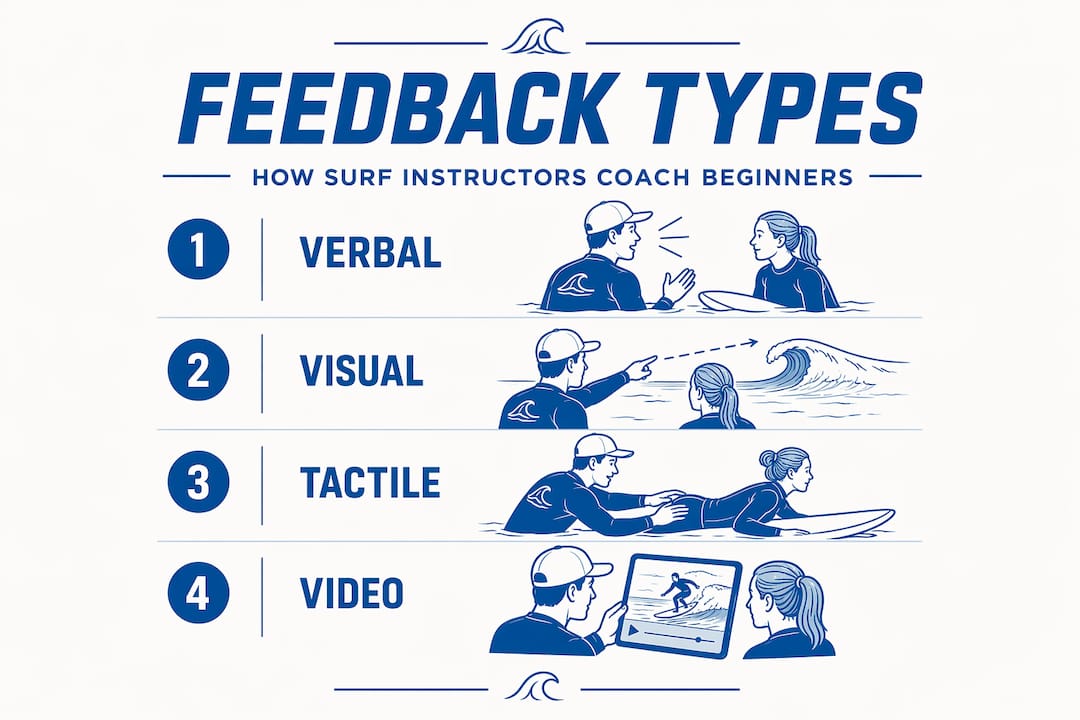
What are the four feedback types instructors use?
Instructors don’t rely on one method. They mix four distinct types depending on where you are in the lesson and what you need to fix.
Verbal feedback is the fastest and most common. Short cues like “compress,” “look up,” or “pop” work because they’re tied to a single physical action. Instructors also use metaphors: “pretend you’re jumping over a puddle” for the pop-up, or “reach for the nose of the board” for paddle depth. The best verbal cues give you a physical image, not a technical description.
Visual demonstration happens mostly on the beach. Your instructor models the correct movement so your brain has a target before your body tries it. Some instructors also demonstrate in the water, paddling alongside you and showing the correct paddle stroke or stance. Watching a skilled surfer do it slowly and deliberately is more useful than watching surf videos at full speed.
Tactile or hands-on feedback is used selectively. An instructor might press your hips into the correct position, adjust your foot placement on the board, or steady your shoulders during a pop-up drill. This type of feedback is especially effective for beginners because it creates a proprioceptive reference, a physical memory of what “right” actually feels like.
Recorded video is the most objective of the four. It shows you what you’re actually doing versus what you think you’re doing. That gap is almost always surprising.
| Feedback type | Best for | Limitation |
|---|---|---|
| Verbal | Real-time, in-water corrections | Relies on hearing and timing |
| Visual/demo | Building a movement target before entry | Less effective mid-wave |
| Tactile/hands-on | First-session stance and balance | Fades as student gains independence |
| Recorded video | Objective review, subtle errors | Requires review time after session |
Pro Tip: Ask your instructor which feedback type they’re using and why. Understanding the method helps you receive it better. A coach who explains “I’m going to adjust your back foot so you feel the correct position” is giving you context that makes the correction stick longer.
How does video analysis speed up your progress?
Video is the one feedback tool that shows you what your instructor already sees. Most beginners are shocked by the difference between how a wave felt and what the footage actually shows.
The workflow is straightforward:
- Your instructor or a second coach films your wave from the beach or a nearby position
- After the session, you watch the footage together
- The coach timestamps the key moment: the pop-up, the stance, the weight distribution
- You identify the error visually, not just intellectually
- You paddle back out and apply the correction with that image in your head
Video review gives an external perspective that reveals subtle errors coaches can’t fully explain with words alone. This is especially useful for the transition from consciously trying to do something correctly to doing it automatically.
Practical options for getting footage:
- Ask your instructor if filming is part of the lesson package
- A friend on the beach with a smartphone works for basic review
- Simple slow-motion video on any modern phone is enough to see the pop-up sequence clearly
- Some coaching apps allow you to annotate frames and share notes with your instructor
How to use footage between lessons. Watch the clip within 30 minutes of your session, while the physical sensations are still fresh. Record a voice memo describing what you see and what you want to fix. Then run the corresponding land drill: if the video shows your back foot landing too far forward, do 10 pop-ups on the floor that night with a piece of tape marking the correct foot position.
Pro Tip: Ask your instructor to narrate while you watch the footage together. Their real-time commentary on specific frames is more useful than watching the clip alone three times.
What do common instructor cues actually mean?
Short cues are the language of surf coaching. Here’s what the most common ones are directing you to do physically.
- “Commit” — stop hesitating at the moment the wave lifts your board. Paddle two more strokes than you think you need, then pop without pausing.
- “Look up” — your eyes are pointed at the board. Lift your gaze to the shore or the horizon. Where your eyes go, your body follows.
- “Compress” — bend your knees lower. Most beginners stand too upright, which raises their center of gravity and makes balance harder.
- “Pop” — execute the pop-up in one explosive motion. A slow, two-stage stand-up is the most common beginner error and the first thing instructors correct.
- “Hands flat” — your hands are too close together or gripping the rails. Flat palms near your chest give you a cleaner, faster push.
How to practice a cue on sand, then apply it in the water. Pick one cue from your last lesson. Do 10 pop-ups on the floor that night, saying the cue out loud as you execute the movement. The verbal-physical pairing accelerates retention. The next time you hear that word in the water, your body already knows what to do.
Pro Tip: Pair each cue with a physical sensation rather than a technical description. “Compress” means “feel your thighs burning slightly.” “Look up” means “see the shoreline.” Sensory anchors outlast mental checklists in the water.
| Cue | Physical action | Common error it corrects |
|---|---|---|
| Commit | Two extra paddle strokes, then pop | Hesitating and letting the wave pass |
| Look up | Eyes to the horizon | Staring at the board, causing nose-dives |
| Compress | Bend knees, lower hips | Standing too upright, losing balance |
| Pop | One explosive motion | Slow two-stage stand-up |
| Hands flat | Palms near chest, not gripping rails | Gripping the board, slowing the pop-up |
How do instructors measure your progress as a beginner?
Progress in surfing is not a straight line. Instructors know this and they track it differently than beginners expect.
The typical milestones, in order:
- Session 1–3: Stand up in whitewater on a foam board, even briefly. Most beginners achieve this in their first structured lesson.
- Sessions 5–10: Catch small waves more consistently, paddle without constant guidance, and hold the stance for a full ride.
- Sessions 10–20: Begin selecting waves independently and riding down the line rather than straight to shore.
- Several months of regular practice: Read wave shapes, position in the lineup without help, and handle slightly larger conditions.
Standing up in your first lesson is a real achievement, but it tells your instructor one specific thing: your pop-up mechanics are functional in ideal conditions. It doesn’t mean you can read waves, paddle into position, or handle anything outside of gentle whitewater. Instructors use it as a starting point, not a finish line.
Progression is non-linear. You’ll have sessions where everything clicks, then a session where you can’t seem to stand up at all. That regression usually means you’ve changed a variable: different board, bigger waves, more fatigue. Skilled coaches treat those sessions as diagnostic data, not failure.
| Milestone | Typical timeline | Instructor checkpoint |
|---|---|---|
| Stand up in whitewater | Sessions 1–3 | Pop-up mechanics, foot placement |
| Catch waves consistently | Sessions 5–10 | Paddle timing, commitment |
| Ride green waves | 2–4 weeks of regular practice | Wave selection, angled takeoff |
| Paddle to lineup independently | 10–20 sessions | Ocean reading, positioning |
Trust signals worth looking for in any instructor: a small coach-to-student ratio so you get real corrections, clear safety protocols from the first minute, and access to filmed review so your progress is visible and trackable.
How do you lock in feedback between lessons?
A single well-run coaching session can teach more than weeks of unguided practice, but only if you do something with the correction before the next session. Here’s how to make that happen.
The 30-minute retention window. Retention drops quickly after a session ends. Within 30 minutes of getting out of the water, record a short voice memo or write three things: the primary correction your instructor gave, the cue word attached to it, and the drill you’ll use to practice it.
Daily land drills tied to common corrections:
- 5 pop-ups on the floor — use a piece of tape to mark correct foot placement
- Surf-stance squats — 3 sets of 10, holding the compressed stance at the bottom
- Paddle sets — lie on a foam roller or the floor and practice the paddle stroke for 2 minutes
- Surfskate rotations — if you have access to a surfskate, 10 minutes of carving reinforces weight transfer
The micro-practice routine. Ten to fifteen minutes a day, focused on one correction only. Don’t try to fix your pop-up, your paddle, and your stance in the same session. Focusing on too many corrections at once causes frustration and slows progress.
How to log your sessions. Keep a simple log with five fields: date, wave conditions, primary correction, drill completed, and result. Share it with your instructor before the next lesson. Coaches who see your log can skip the diagnostic phase and go straight to the next correction.
Pro Tip: Use the between-lesson drills on Hhsurf’s how-to page to match your land practice to the specific correction your instructor gave. Targeted drills beat generic fitness work every time.
How do you get the most out of your post-lesson debrief?
The debrief is the most underused part of a surf lesson. Most beginners are tired, stoked, and ready to leave. The ones who improve fastest stay for the conversation.
A good debrief covers four things: the primary correction from the session, two or three secondary observations, recommended drills for the week, and an optional review of any filmed footage. Your instructor should lead this, but you can prompt it with specific questions.
Questions that get useful answers:
- “What was the single most important thing I need to fix before next time?”
- “Can you show me on the video where my foot placement went wrong?”
- “What drill should I do this week to work on that?”
- “What should we focus on in the next lesson?”
Avoid “What else should I work on?” That question invites a list, and a list is the opposite of what you need.
Requesting and storing footage. Ask your instructor to timestamp the key moments before you watch. A clip with no context is less useful than a clip where the coach says “watch frame 0:12, that’s where your back foot lands too far forward.” Record a voice memo immediately after, describing what you saw and what you’ll drill.
Pro Tip: Before you leave the beach, confirm one thing with your instructor: the single correction you’re taking into your next session. Write it on your hand if you have to. That one sentence is worth more than a page of general notes.
Your post-lesson action plan:
- Stay for the full debrief, even if you’re tired
- Ask for the primary correction in one sentence
- Request footage with timestamps if available
- Record a voice memo within 30 minutes
- Confirm the drill you’ll practice before the next session
- Log the session before you go to sleep
Key Takeaways
Instructor feedback works because it’s prioritized, timed, and tied to immediate repetition. One correction per session, applied on the next wave, is the fastest path from beginner to independent surfer.
| Point | Details |
|---|---|
| One correction per session | Commit to the single priority your instructor gives; multiple corrections slow progress. |
| Capture feedback within 30 minutes | Record a voice memo or write three things: cue, correction, and drill before memory fades. |
| Video makes errors visible | Filmed review reveals what words can’t explain and speeds up the learning curve. |
| Progress is non-linear | Regressions after a good session are normal and give instructors diagnostic data. |
| Hhsurf’s structured approach | Hans Hedemann Surf School uses small ratios, safety-first instruction, and filmed review to give beginners prioritized, trackable feedback from the first lesson. |
What coaches wish every beginner understood before their first lesson
Most beginners come into a lesson expecting to be told everything that’s wrong. That’s not how good coaching works, and it’s not how learning works either.
The most effective instructors give one correction and let you repeat the attempt. Not because they don’t see the other errors, but because they know your nervous system can only absorb one new pattern at a time. A beginner who receives five corrections simultaneously doesn’t fix five things. They fix zero, because the cognitive load is too high to act on any of them.
Regressions are not failure. When you have a session where you can’t seem to stand up after a week of solid progress, that’s usually a sign that your brain is consolidating a new pattern, not losing an old one. Coaches who understand this don’t panic when a student regresses. They use it as a diagnostic: what changed? The board? The wave size? The fatigue level? That information shapes the next correction.
Three things worth looking for in any instructor: a small coach-to-student ratio so your corrections are specific to you, not generic advice shouted at a group; clear safety protocols from the first minute on the beach; and access to filmed review so your progress is visible and measurable. Those three signals tell you whether a school is actually invested in your improvement or just getting you on a board and wishing you luck.
The gap between a beginner who improves quickly and one who plateaus is almost never talent. It’s almost always whether they listened to one correction and applied it immediately, or tried to fix everything at once and fixed nothing.
Ready to get structured, filmed feedback at Hhsurf?
Knowing how feedback works is one thing. Getting it from a coach who delivers it well is another entirely.
Hhsurf’s private surf lessons in Waikiki are built around exactly the methodology this guide describes: small coach-to-student ratios, a safety-first beach briefing, real-time in-water cues, and filmed review available so you can see your own errors and track your progress session by session. Hans Hedemann Surf School’s instructors are professional surfers who know how to isolate the one correction that will move you forward fastest, not hand you a list of everything you’re doing wrong. Lessons run in Waikiki’s warm, beginner-friendly surf, and kids surf lessons are available for younger learners who need a safety-focused, patient approach. Book a private or group lesson at Hhsurf and get the prioritized, filmed feedback that turns a first-timer into a surfer.
Further reading and sources
The claims in this guide draw from coaching research, surf instruction methodology, and beginner progression data. These sources are worth reading if you want to go deeper on any specific topic.
- Rapture Camps: Getting the most from surf coaching sessions — the source for the one-correction principle, the 30-minute retention window, and the video review workflow. Directly applicable to every lesson you take.
- OMBE: Stages of improving your surfing — explains the four stages of skill acquisition and why instructors tailor cues to your current stage. Useful for understanding why feedback changes as you improve.
- OceanRoad: How long does it take to learn surfing? — realistic beginner timelines and a clear explanation of why progression is non-linear. Read this before your first lesson to set honest expectations.
- Aqua Surf: How to surf — covers safety briefing content including rip current protocol and wave etiquette. Good reference for the beach portion of any beginner lesson.
- Searplugs: Surfing 101 — explains why timing and commitment matter more than strength for beginners catching their first waves.
- Xanadu Surf: How long does it take to get good at surfing? — a detailed progression timeline with honest notes on the role of consistent practice and appropriate equipment.
- Hhsurf: Your first surf lesson, step by step — the full lesson sequence from Hhsurf’s perspective, useful for anyone preparing for their first session at Hans Hedemann Surf School.
0 Comments