
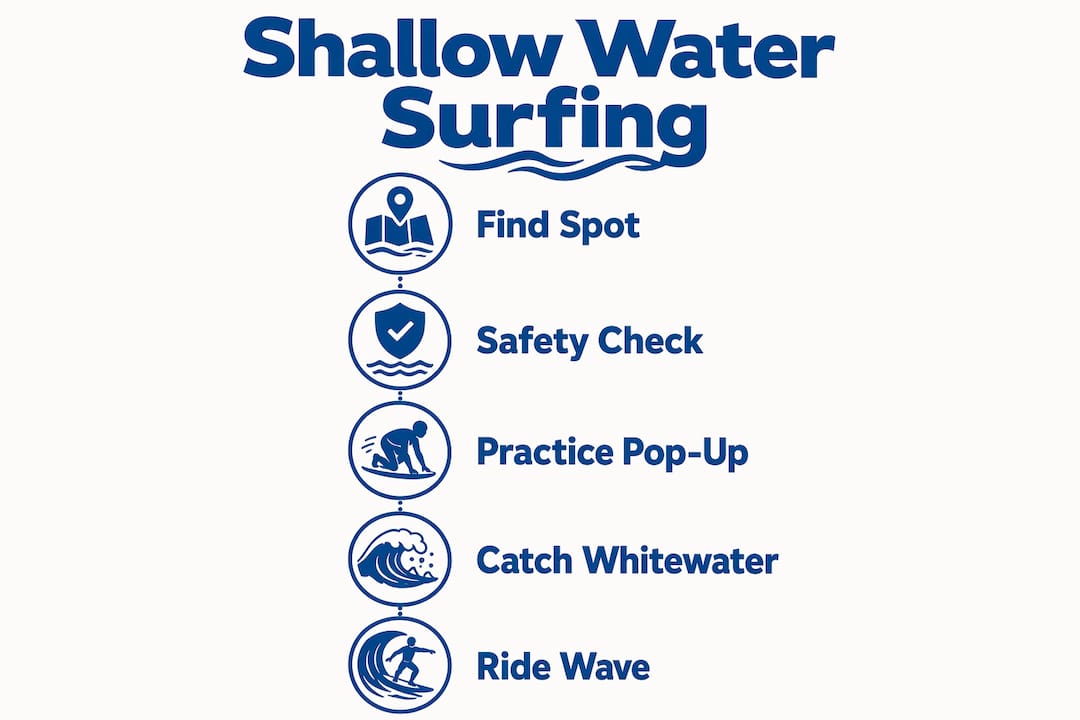
Shallow water surfing means learning to ride waves in waist-to-chest-deep water, specifically in the whitewater (the foamy, broken wave) that rolls toward shore after a wave has already collapsed. You’re not chasing unbroken swells. You’re using the gentle, forward-pushing foam as your training ground, with an instructor standing right beside you.
Who it’s for: absolute beginners, kids, nervous swimmers, and anyone who wants to build real confidence before moving to open-face waves.
Who should skip it: experienced surfers hunting hollow, fast-breaking waves. Whitewater is too slow and too predictable for that.
Quick benefits at a glance:
- You can stand up after every fall, which removes the fear of deep water
- Waves are predictable, so you get more attempts per session
- An instructor can stand next to you and stabilize the board
- Feedback is instant: you feel immediately whether your pop-up worked
Table of Contents
- What is shallow water surfing, and why do waves break there?
- Why shallow water is the best place for beginners to learn
- Where and when should you practice shallow water surfing?
- What equipment do you need for shallow water surfing?
- How to catch whitewater: step-by-step technique
- Safety checklist for every shallow-water session
- What happens in your first lesson?
- How professional instructors structure shallow-water teaching
- Key Takeaways
- The part most beginners get wrong
- Ready to catch your first wave with Hhsurf?
- Useful sources
What is shallow water surfing, and why do waves break there?
Instructors use several terms interchangeably: whitewater practice, foam rides, and beginner sandbar sessions. They all describe the same zone. Understanding why waves break there helps you pick the right spot and know what to expect.
When a deep-ocean swell travels toward shore, it eventually hits water shallower than half its wavelength. At that point, the seafloor exerts drag, the wave slows, steepens, and the crest topples forward. That collapse is the break. What’s left rolling toward the beach is the whitewater, a wall of aerated, slower-moving water that can travel 30 meters or more toward shore.
| Wave Stage | What’s Happening | Where to Practice |
|---|---|---|
| Deep-water swell | Fast, circular orbital motion; no seafloor contact | Nowhere yet — paddle out through this |
| Shoaling | Wave slows, grows taller as depth decreases | Transition zone; not ideal for beginners |
| Breaking | Crest collapses forward into foam | Watch from shore; this is the power zone |
| Whitewater | Foam rolls steadily toward shore | Your beginner practice zone |
Key terms to know:
- Whitewater / foam / soup: the frothy water after a wave breaks; your training wave
- Beach break: waves that break over a sandy bottom; the safest type for beginners
- Shallow-water wave: any wave in water less than half its wavelength deep
- Skimboarding: a separate sport that uses much shallower water and a smaller, finless board; don’t confuse it with surfing
Why shallow water is the best place for beginners to learn
The most underrated advantage of waist-to-chest depth is psychological. When you know you can plant your feet on the sand after a wipeout, your brain stops allocating energy to fear and starts focusing on technique. That shift is significant for skill acquisition.
Physically, the setup is equally forgiving. An instructor can stand in the water, hold the tail of your board, and give you a controlled push into the foam. You get repeated attempts without a long paddle-out between each one. Every broken wave that rolls through is another chance.
Why instructors prefer this environment:
- Predictable wave energy means consistent timing practice
- No long paddle-outs; reset takes seconds
- Instructor can physically stabilize the board during the pop-up
- Falls are low-consequence; students recover quickly and try again
- Faster feedback loop accelerates learning
Pro Tip: Before you ever catch a moving wave, rehearse your pop-up on dry sand. Do it ten times until the movement is automatic. Then practice it again standing in waist-deep still water. By the time whitewater hits you, your body already knows what to do.
Where and when should you practice shallow water surfing?
Location matters more than most beginners realize. A sandy-bottom beach break is the standard for beginner safety because sand is forgiving when you fall and doesn’t hide sharp hazards the way reefs do. For U.S. beginners, beaches like those along Destin, Florida or the Gulf Coast offer gentle, sandy-bottom conditions that suit first lessons well.
Beach checklist before you paddle out:
- Sandy bottom with no exposed rocks or reef
- Gentle, spilling beach break (not a steep shorebreak)
- Lifeguards on duty
- Low swimmer traffic in your practice zone
- Check the beginner surf zone for your specific beach before committing
Tide timing: Mid-tide is generally the sweet spot for lessons. At mid-tide, sandbars sit at a depth that produces consistent, manageable whitewater without the wave energy becoming too heavy or too flat. Low tide can expose shallow hazards; high tide can push the break too close to shore and increase shorebreak intensity.
Conditions to skip entirely:
- Strong offshore or onshore winds (waves become choppy and unpredictable)
- Storm swell or any advisory for elevated surf
- Rip channel visible near your intended practice zone
- Water quality advisories posted by local authorities
Environmental note: stay off dune vegetation when walking to the water, keep your distance from shorebirds nesting near the tide line, and always follow posted lifeguard directions. These aren’t suggestions.
What equipment do you need for shallow water surfing?
Keep it simple. The right gear for shallow-water lessons is not the same gear you’ll eventually use for open-face waves.
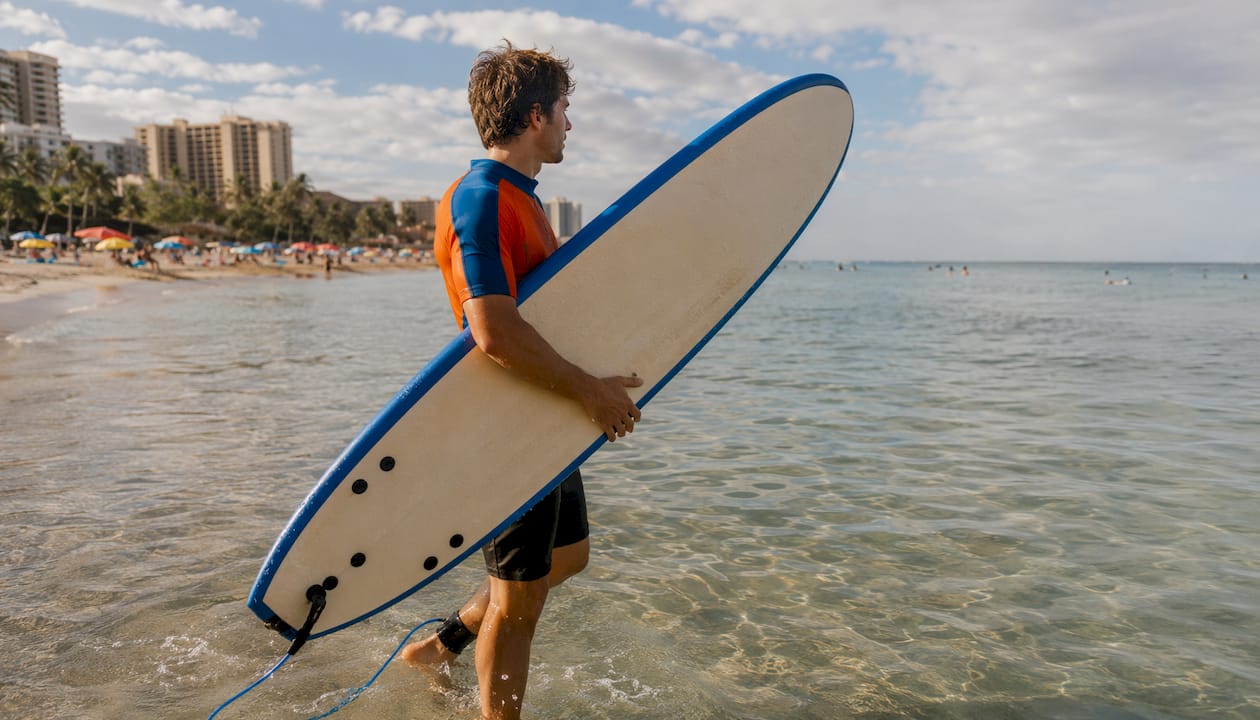
Board: A soft-top foam board is the standard choice for beginners. The foam surface is forgiving during wipeouts, the extra volume keeps you afloat between attempts, and the fins are typically flexible enough to reduce injury risk. Soft-top boards and leashes reduce injury risk and speed up skill acquisition for both children and adults. Size-wise, longer and wider is better for stability; beginners typically use boards that are long and wide for better balance.
Safety items:
- Leash (always, even in shallow water; a loose board becomes a hazard to others)
- Rash guard or wetsuit depending on water temperature
- Surf booties if the beach has shells or rough sand
- Reef-safe sunscreen applied before entering the water
- Small first-aid kit in your bag for minor cuts
Board positioning: always keep the board on the seaward side of your body when wading out. If a wave hits the board, it moves away from you rather than into you. Also confirm your fins clear the seafloor when you’re in your practice zone; fins dragging the bottom means you’re too shallow.
For young learners: helmets are worth considering for children under eight, and flotation vests are appropriate where water conditions or swimming ability warrant them.
How to catch whitewater: step-by-step technique
Paddling fundamentals are the foundation of everything. You cannot catch a wave you can’t paddle into. Start there.
- Set up on the board: Lie centered on the board, chin up, toes near the tail. Your chest should be slightly arched, not flat.
- Paddle toward shore: Use long, deep strokes alternating arms. Keep your fingers together and pull through the water, not over it.
- Read the whitewater: Watch the foam rolling toward you. When it’s about 6–8 feet away, start paddling hard in the same direction (toward shore).
- Feel the push: The foam will catch the tail of your board and push it forward. That’s your cue.
- Pop up: Place both hands flat under your chest (not on the rails). Push up explosively, bring your back foot up first, then your front foot. Land in a wide, athletic stance.
- Establish your stance: Feet shoulder-width apart, knees bent, arms out for balance. Eyes forward, not down at the board.
- Ride it in: Let the foam carry you toward shore. Steer with subtle weight shifts.
Pro Tip: Keep your eyes on the beach horizon, not your feet. Looking down shifts your weight forward and causes nose-dives. Pick a fixed point on shore and ride toward it.
Safety checklist for every shallow-water session
Check these before you enter the water, not after.
Pre-session:
- Review the tide chart (NOAA Tides & Currents is the go-to U.S. resource)
- Check wind and swell forecast on Surfline
- Confirm lifeguard presence and flag color
- Scan the water for rip channels (look for darker, calmer-looking lanes between breaking waves)
- Inspect your leash and board for damage
Common hazards and how to handle them:
- Hidden shells or rocks: shuffle your feet when wading, don’t step hard
- Unexpected shorebreak: if a wave breaks directly on you, turn sideways and crouch low
- Rip current: don’t fight it; paddle parallel to shore until you’re out of it, then angle back in
How to fall safely: use the starfish technique. When you wipe out in shallow water, spread your arms and legs wide and fall flat to the surface. Distributing your body across the surface area prevents you from being driven hard into the bottom.
Pro Tip: When bailing in very shallow water, always jump feet first, lightly, as if stepping into the shallow end of a pool. Never fall butt-first; the tailbone impact on a submerged shell or rock is serious.
Emergency protocol: signal to the lifeguard immediately for any injury. Use your board as a flotation device if you or someone else needs support. Call 911 for any head, neck, or spinal injury; do not move the person.
What happens in your first lesson?
A well-structured first lesson follows a clear sequence. Here’s what to expect:
- Safety brief on the beach: hazards, hand signals, leash use, and how to fall
- Warm-up and stretching: shoulders, hips, and ankles (more on this below)
- Land pop-up drills: ten or more repetitions on the sand before touching water
- Wading in: instructor guides you to the right depth and explains board positioning
- First whitewater attempts: instructor stabilizes the board, gives a push, you pop up
- Supervised rides: short, repeated rides straight to shore
- Debrief: instructor identifies one or two specific technique fixes
Realistic progression looks like this: most beginners stand on foam in their first lesson. Consistent small rides typically develop over three to six lessons. The move to small unbroken waves comes after your pop-up is automatic and your timing is reliable. Success in the early stage means a clean pop-up, a controlled ride straight to shore, and the ability to fall safely and remount without help.
Warm-up exercises that matter for shallow-water surfing:
- Shoulder circles and arm swings (paddling prep)
- Hip flexor lunges (pop-up mobility)
- Ankle rotations (balance and stance stability)
- Torso twists (weight-shift practice)
- Light squats (leg strength for the pop-up landing)
How professional instructors structure shallow-water teaching
The best instructors don’t just push you into waves and hope for the best. They build a repeatable system.
Instructor method essentials:
- Individualized attention: one instructor watches your specific movement pattern, not a generic class
- Stand-by stabilization: instructor holds the board tail until the moment of the push
- Short, repeated attempts: volume of attempts beats length of any single ride
- Immediate correction: technique errors get addressed between waves, not at the end of the session
Hhsurf (Hans Hedemann Surf School in Waikiki) structures lessons around exactly this approach. The school’s how-to methodology emphasizes individual attention and a high first-lesson success rate, with professional surfers guiding students through the same whitewater progression described in this article. The school operates at both Waikiki and the North Shore, giving beginners access to two distinct beach environments.
“The goal of a first lesson isn’t to surf a perfect wave. It’s to stand up, feel the push of the water, and leave the beach knowing you can do it again.” — Hhsurf teaching philosophy
Questions to ask any instructor before booking:
- How many years have you been teaching, and are you certified?
- What is your student-to-instructor ratio?
- What is your cancellation and reschedule policy?
- Does the school carry liability insurance?
Key Takeaways
Shallow water surfing in waist-to-chest-deep whitewater is the safest, fastest way for beginners to build real surfing fundamentals with an instructor standing beside them.
| Point | Details |
|---|---|
| Where to practice | Sandy-bottom beach break, waist-to-chest depth, mid-tide window for best conditions |
| Essential gear | Soft-top foam board, leash, rash guard, reef-safe sunscreen |
| Top safety rule | Use the starfish fall technique; always keep the board on the seaward side when wading |
| First lesson outcome | Most beginners stand on foam in their first session with proper instruction |
| Hhsurf approach | Hans Hedemann Surf School uses individualized attention and whitewater progression to get beginners riding in their first lesson |
The part most beginners get wrong
Most beginners think the hard part of shallow-water surfing is the wave. It isn’t. The hard part is trusting that the foam is enough. New surfers often wade out too far, chasing what looks like a “real” wave, and end up in water that’s too deep to recover quickly and too powerful to read. The whitewater zone feels underwhelming from the beach. In the water, it’s exactly right.
The other thing people underestimate is how much the pop-up matters before the water. Instructors at Hhsurf drill the pop-up on sand for a reason: muscle memory built on dry land transfers directly to the board. Skipping that step and going straight to the water almost always means more wipeouts and a slower first session. The sand drill isn’t a warm-up ritual. It’s the actual lesson.
One more thing: mid-tide isn’t just a preference. It’s a meaningful variable. The same beach at low tide and mid-tide can feel like two different breaks. Checking a tide chart before you go isn’t overthinking it. It’s the difference between a productive session and a frustrating one.
Ready to catch your first wave with Hhsurf?
Hhsurf gives beginners something most surf schools don’t: a professional instructor standing in the water beside you, pushing you into whitewater at exactly the right moment, and correcting your technique between every single attempt. That’s not a group class where you watch from the shore. It’s hands-on, wave-by-wave coaching in Waikiki’s warm, clear water.
Book a surf lesson at Waikiki or the North Shore, choose a private lesson for the fastest progress, or check out kids surf lessons if you’re bringing younger surfers. Before you book, confirm group size, instructor ratio, and the cancellation policy. Hhsurf publishes all of this clearly. Check availability and lock in your session at hhsurf.com/surf-lesson.
Useful sources
Reliable references for tide data, wave science, safety technique, and lesson details:
- NOAA Tides & Currents — U.S. tide charts and water-level data for session planning
- LibreTexts: Waves in Shallow Water — oceanographic explanation of how waves break in shallow water
- Surfline — surf forecasts, safety technique references including the starfish fall
- Swimmer Living: Gear for Kids Learning to Surf — equipment guidance for shallow-water beginner sessions
- Hhsurf: How to Surf — step-by-step technique and school methodology
- Hhsurf: Your First Surf Lesson — lesson flow and what to expect as a first-timer
- Searplugs: Surfing 101 — beginner paddling and wave-catching fundamentals
0 Comments